
Table of Contents
Updating home and site URL's for WordPress
Updated May 17th, 2021 at 15:34 BST
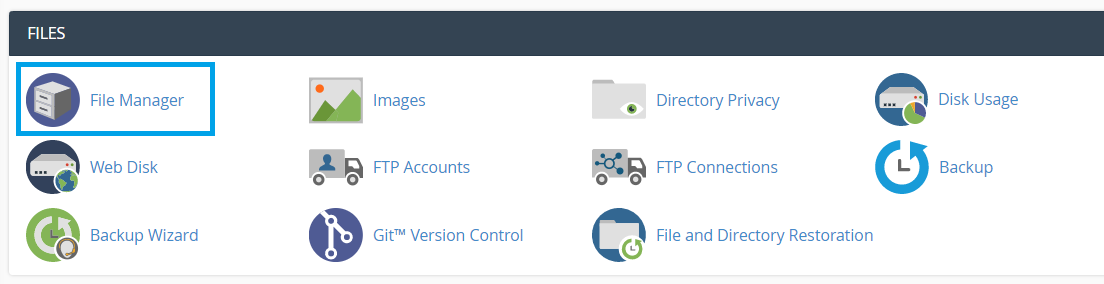
Updating the home and site URLs in cPanel #
1. Go to your cPanel account and access the File Manager tool
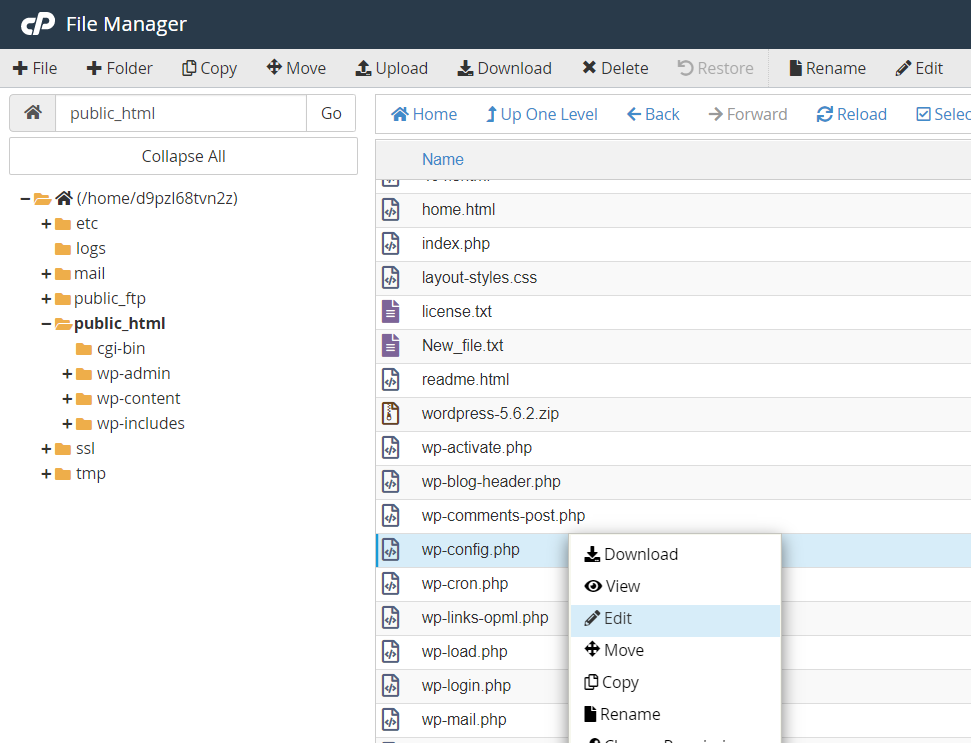
2. Navigate to your public_html folder and righ-click on your wp-config.php file to edit it.
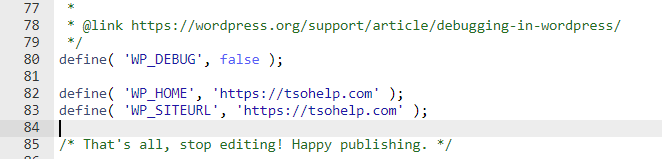
3. You can put the new define rules in your wp-config.php file just above the 'That's all, stop editing..' line
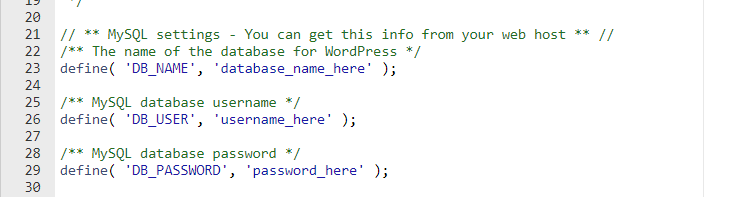
4. In order to update these paths in your database, you can now scroll up the file to check which database your website is using.
5. Go to the phpMyAdmin tool of your cPanel.

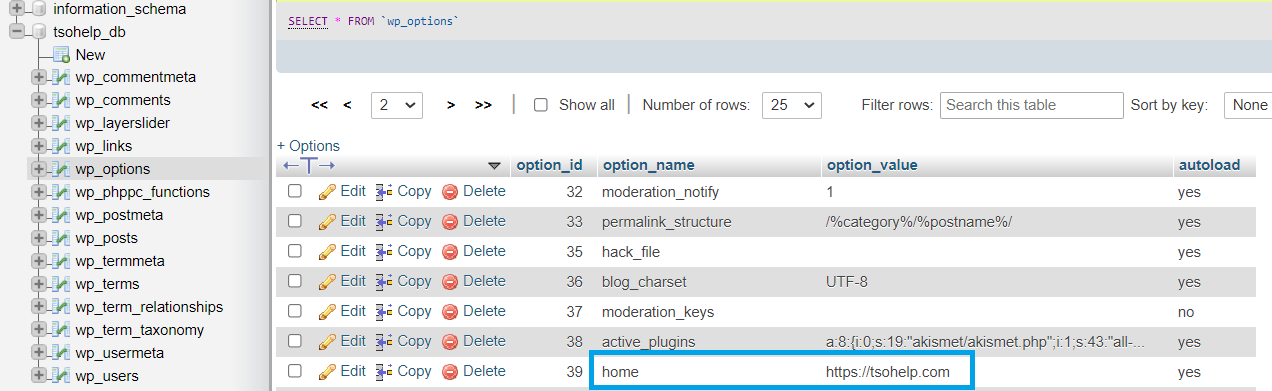
6. Select the database and go to your _options table. First update the 'siteurl' field.

7. Then, search for your 'home' field. In this case, it was on the second page.
How to change the database to reflect .gridhosted.co.uk (for website preview) #
In order to make these changes you will need to be logged into your Cloud Hosting Platform, (http://control.gridhost.co.uk). Once you have logged in, select the website that you would like to change.
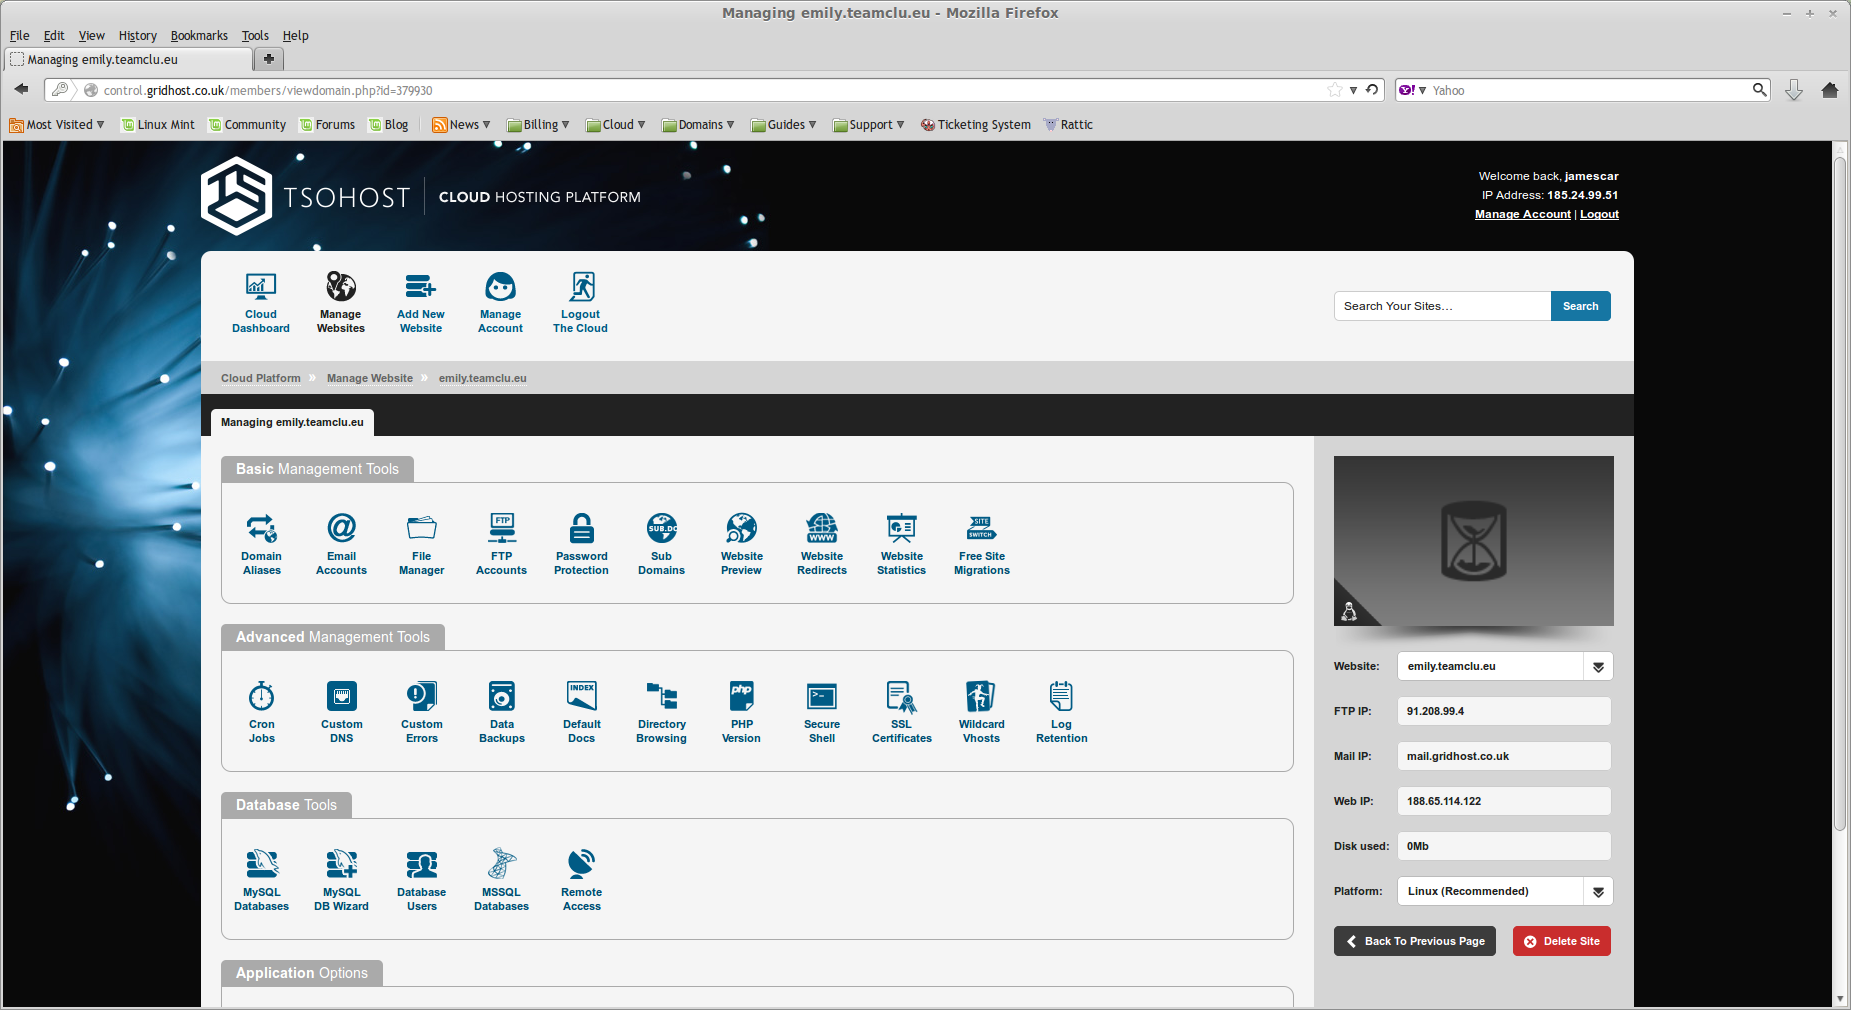
Then click on 'File Manager', this can be found underneath 'Basic Management Tools'. This is where you can view the file structure of your site. From here, click on 'public_html'.

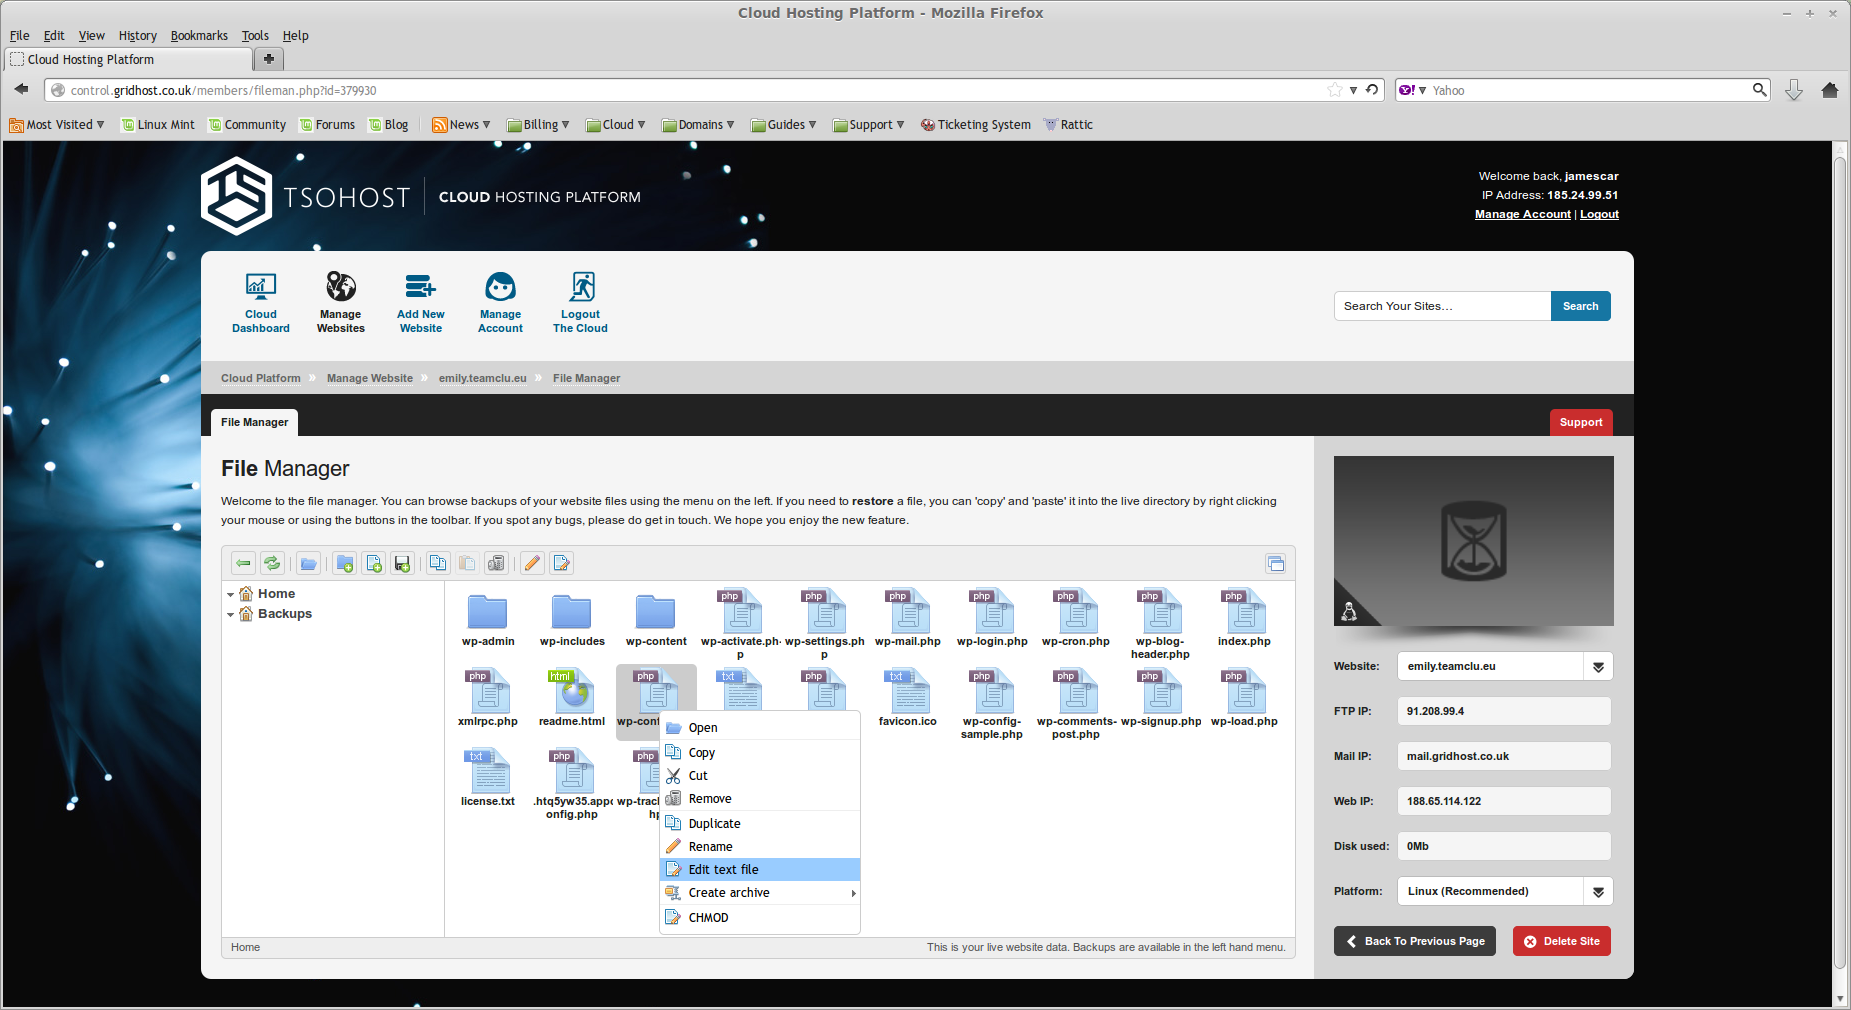
You will now need to locate the file 'wp_config.php' (this page is not alphabeticalised) , right click on this file and select 'Edit Text File'.
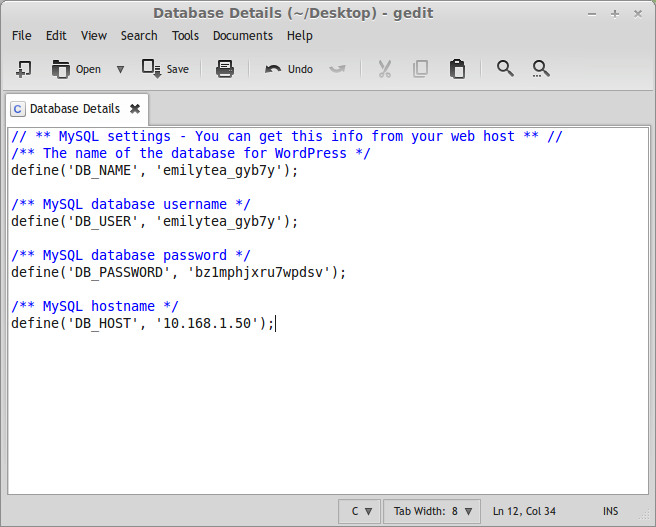
This will open the file in a text editor, where you will need to locate the login details for your database. These should start with '// ** MySQL settings, please see screenshot below regarding which details that are needed.
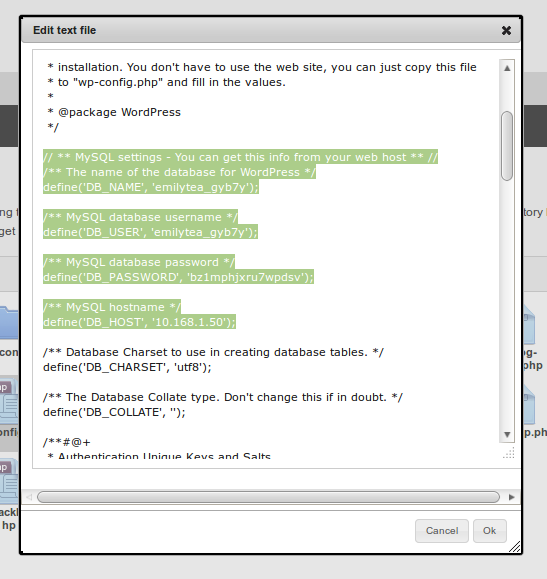
You should select your database name, username, password, and host, copy these and paste them into a text editor. These are the details that will allow you to access your database, if you keep them in a safe place this means you can skip this step next time.
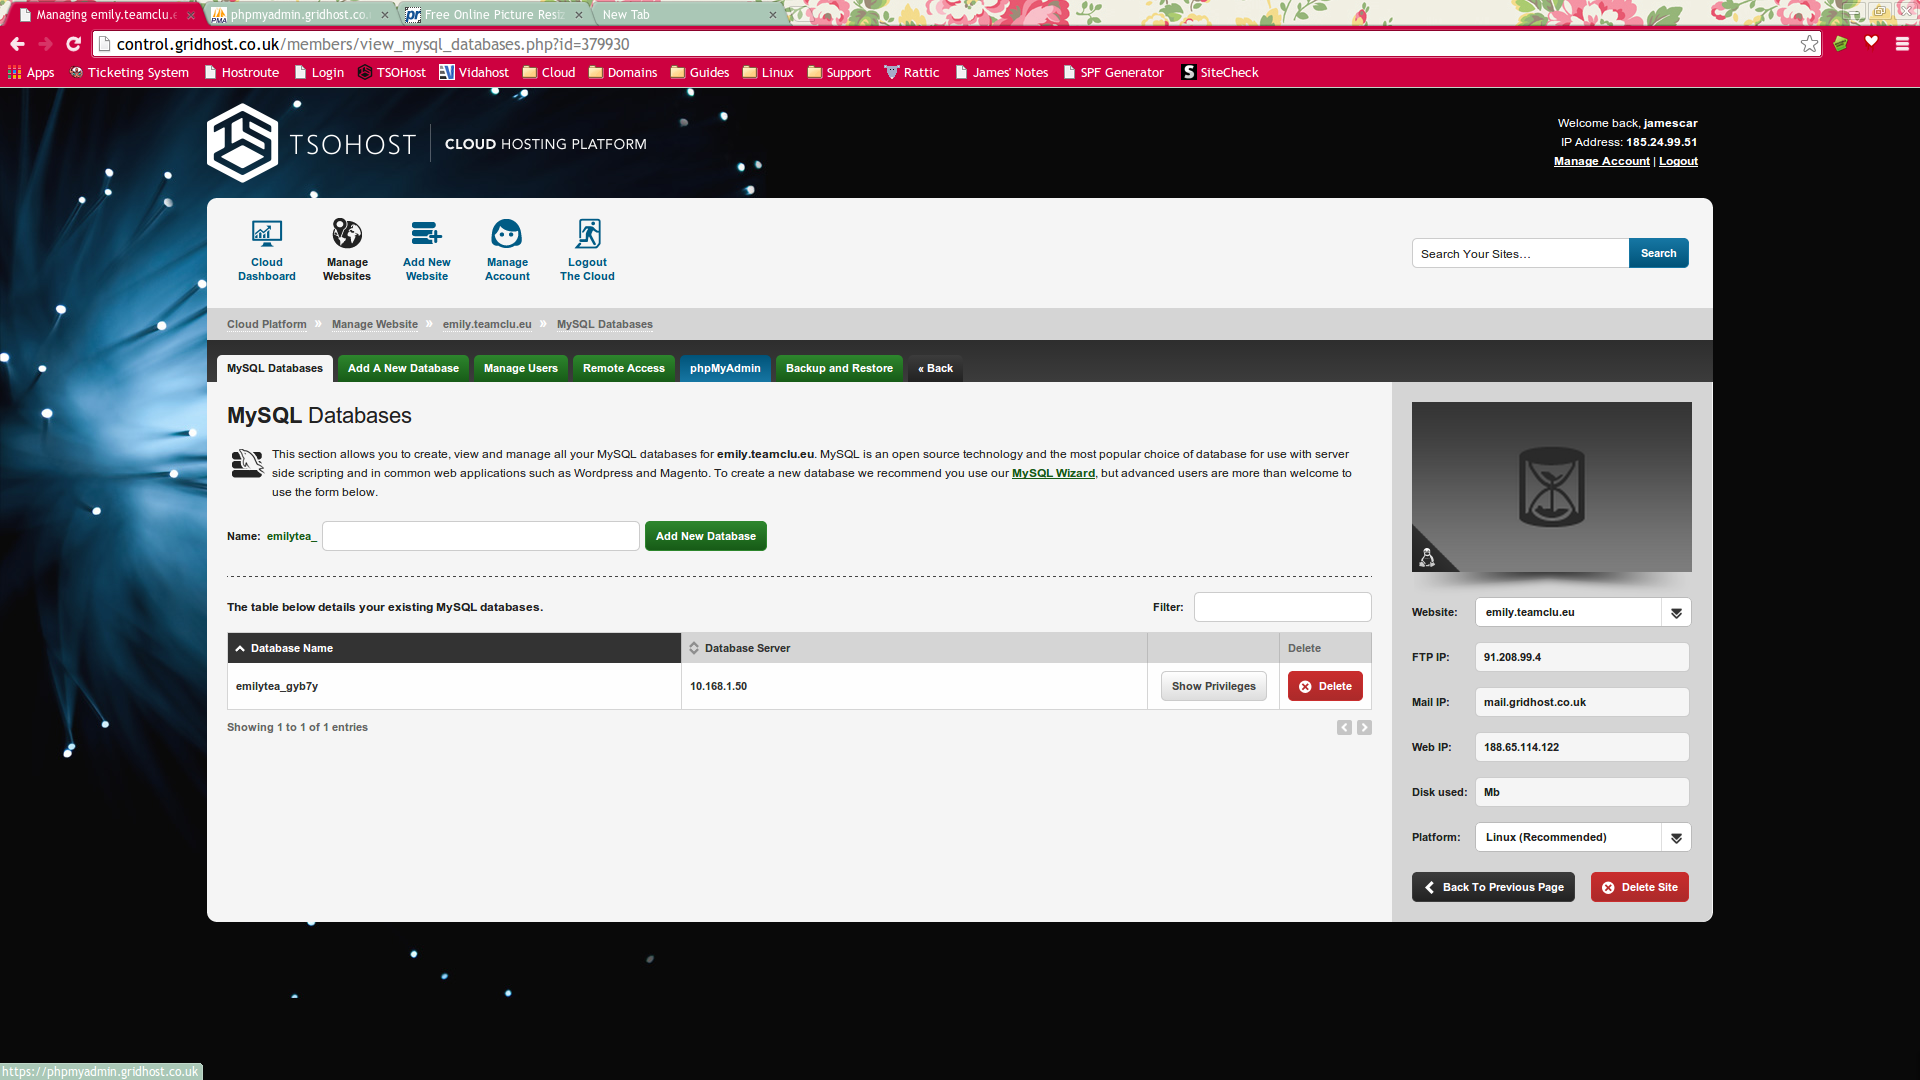
Now, you need to log into the database with those details. To do this, click the back button in your browser to return to the Cloud Hosting Platform for the site you are using. Now click 'MySQL Databases' which can be found underneath 'Database Tools'. You should be able to see a blue tab named 'phpMyAdmin', you will need to click on this and 'OK' to the pop up message.
You should be directed to the phpMyAdmin login page. This is where you will need to enter the details that you have in your text editor. In the 'Username' field paste in the username (DB_USER) and in the password field, paste in the password (DB_PASSWORD). Also ensure that the Server Choice matches the IP address of DB_HOST. 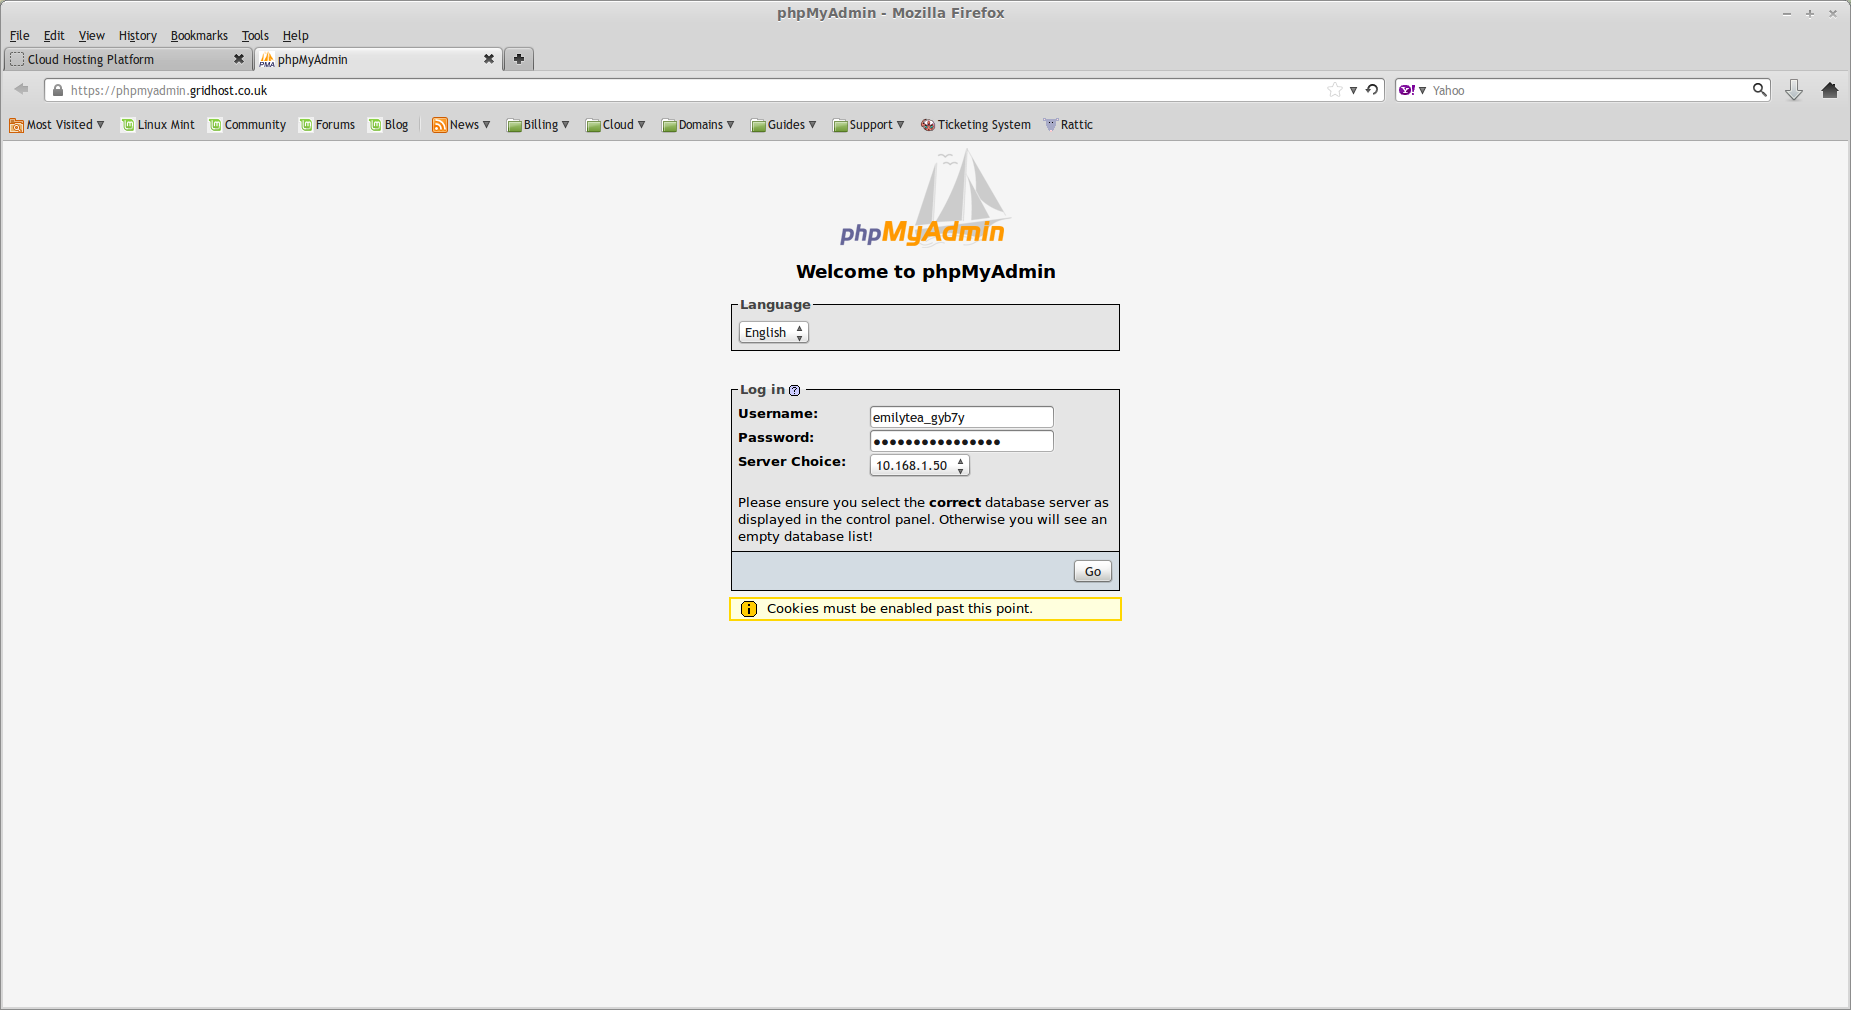
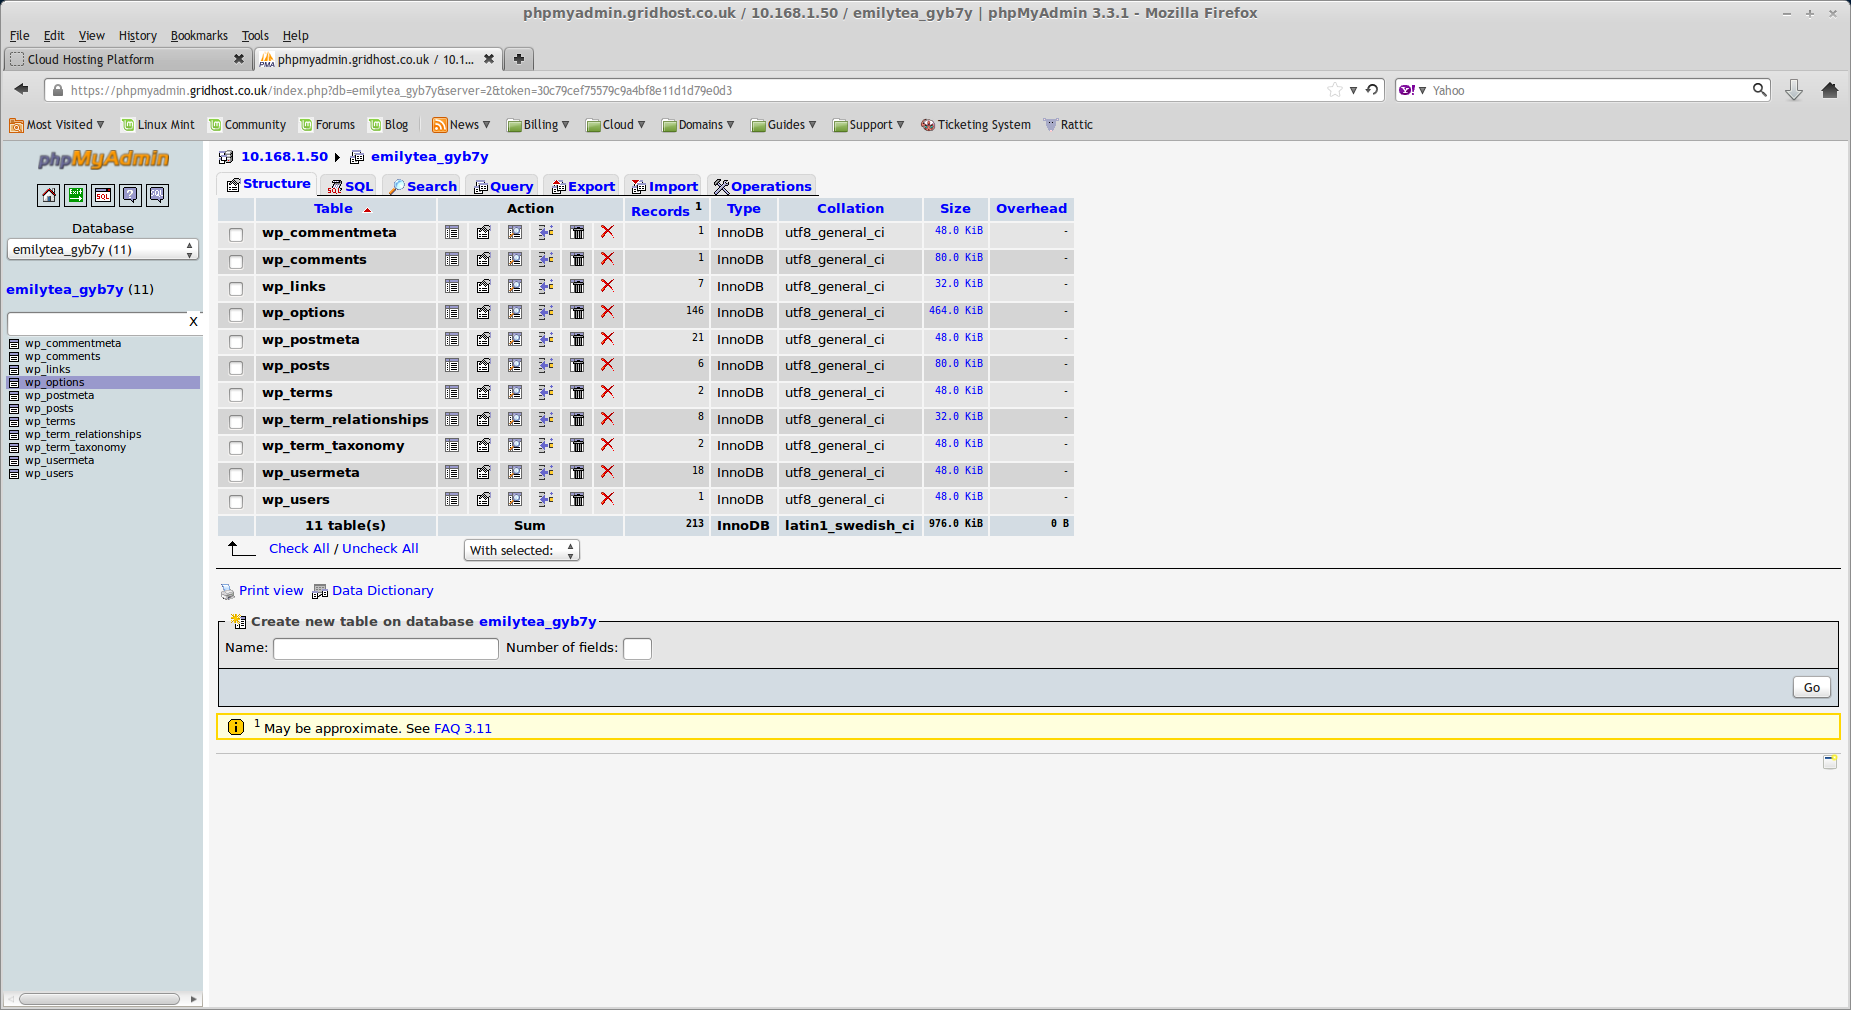
Once you have logged into phpMyAdmin, you will need to select the database, from the left hand side, that you wish to change. This is the 'DB_NAME' from your text file. Once you have selected your database, you should see a drop down menu underneath , from here you need to select 'wp_options'. This should now display a large table.
The first thing you need to change is your site URL to do this, click the pencil icon on the same row as 'siteurl'. You should see the current link to your website, and this is what you will need to change. You should add gridhosted.co.uk to the end of your domain name (which should be in here already).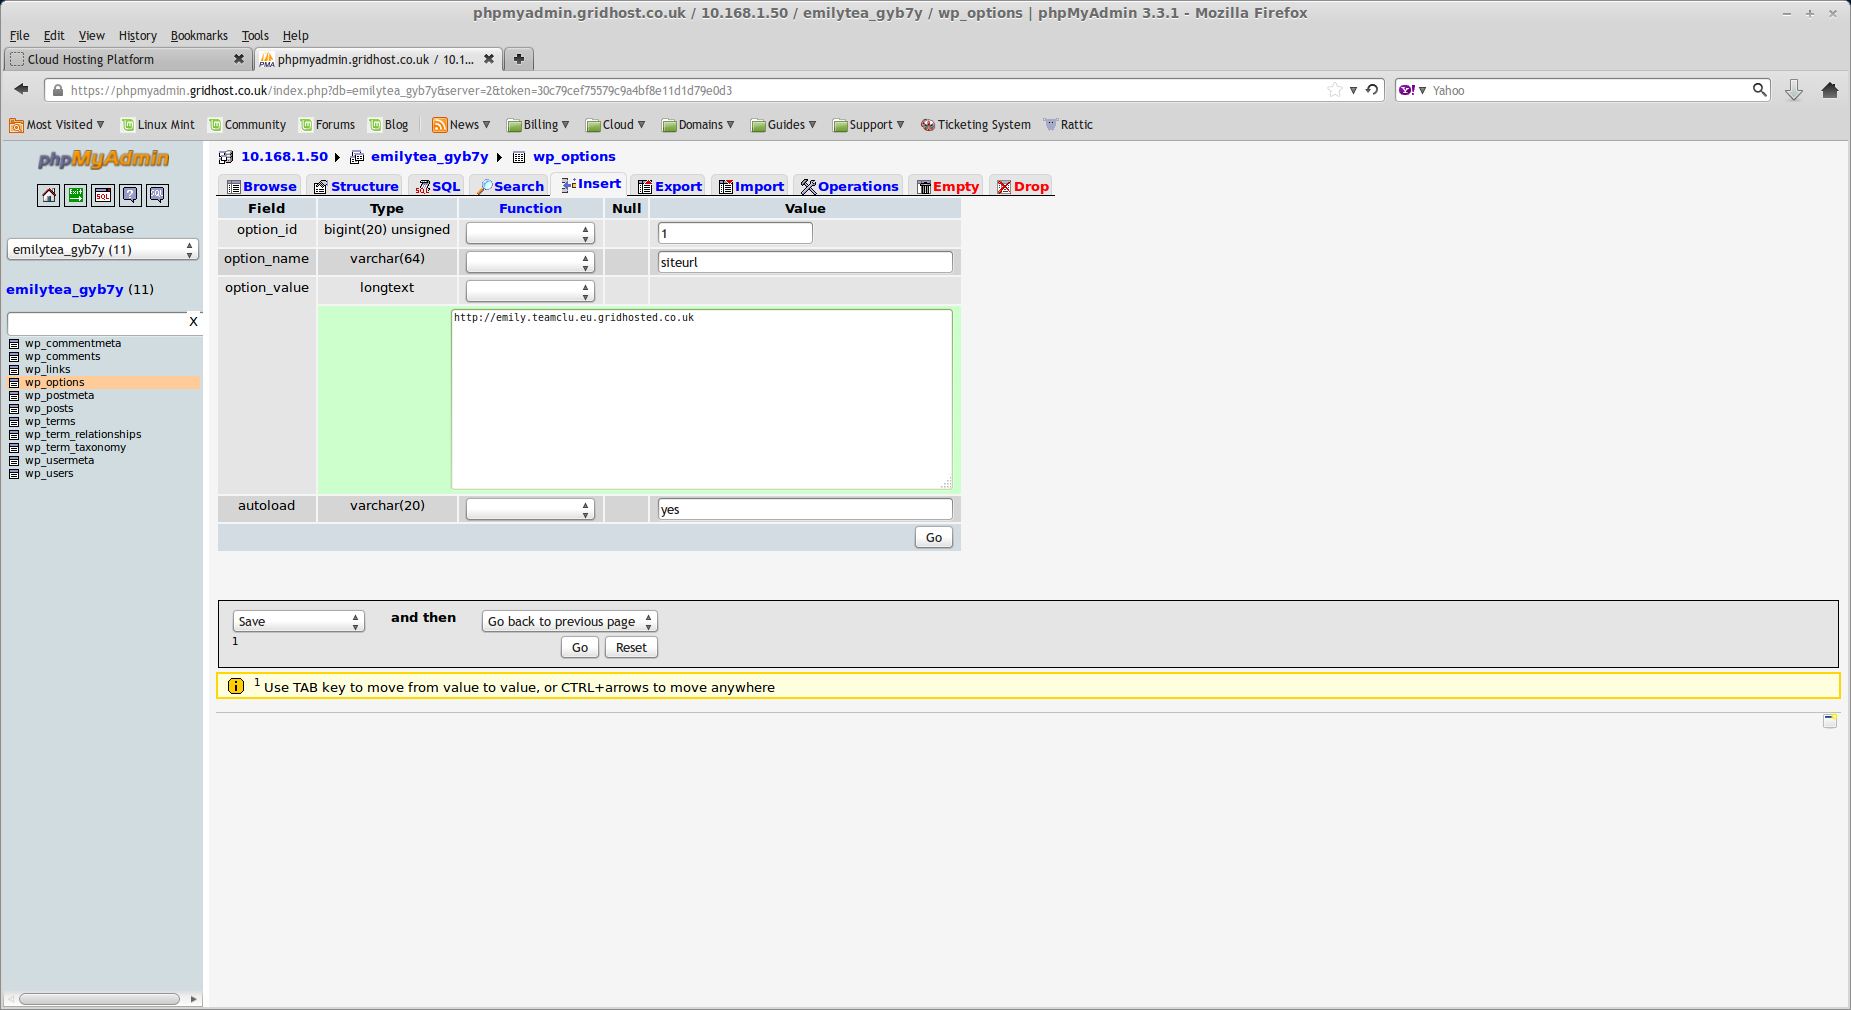
Once you have edited the link, press the 'go' button. This should take you back to the table, where you now need to find the option_name 'home'. This tends to be on the second page, however this can differ between sites. Again, click the pencil icon on the same row, and edit the link, so it matches the siteurl you just changed, and press 'go'.
You have now changed the database entries to reflect the .gridhosted.co.uk. To change the links back to the original, when you want your site to be live again, simply do the same steps but change the links back to the original link.