Table of Contents
How to connect through SSH
Updated Oct 31st, 2017 at 11:32 GMT
SSH is a command line interface for management of your website files and applications.
Setup
If you’re on Mac or any Linux distribution, you already have a built-in terminal that can be used for the SSH connection. To bring it up press Ctrl+Alt+T. This is what your terminal should look like:

For Windows users, you’re just one application download away from having everything needed for an SSH connection. You’ll need to download the application Putty which is widely regarded as the best and simplest SSH client. You can download it from the following website and then run the .exe file:http://www.chiark.greenend.org.uk/~sgtatham/putty/download.html
Login Credentials
Now that you have an SSH tool set up, you need to enter the correct login credentials.
If you are using our Cloud platform you will need to enable SSH, by carrying out the following steps:
- Navigate to https://control.gridhost.co.uk and log in
- Click on ‘Manage Websites’, and then on your domain name
- Click on ‘Secure Shell’ (which is what SSH stands for)
- Click on ‘Click here to Activate SSH’

- Wait up to 5 minutes for the credentials displayed to become active. You’ll need these credentials in the next step
Connecting
We are ready for the final step – the actual connection. Depending on if you are using the Mac/Linux terminal or Putty, you can connect by:
Mac/Linux:
You will just need to type the following in the terminal:
ssh username@server -p port
An example connection on the Cloud would be:
ssh myuser@shell.gridhost.co.uk -p 22
Then you will just need to type ‘yes’ if you are prompted to confirm the connection and enter your password.
Windows (Putty):
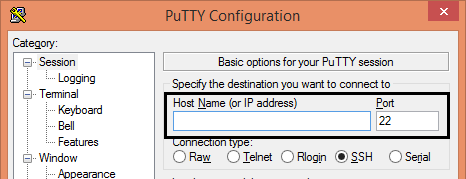
For Putty, you will just need to enter the server hostname in the ‘Host Name’ field, and the port under ‘Port’:

You will then just need to click ‘Open’, and will be prompted for the 'Username' and 'Password'.
