Table of Contents
Manually add my Professional Email to Outlook (Windows)
Updated Oct 26th, 2021 at 14:55 BST
If the account detection tool doesn't work, here's how to manually configure your account settings in Outlook 2016 for Windows.
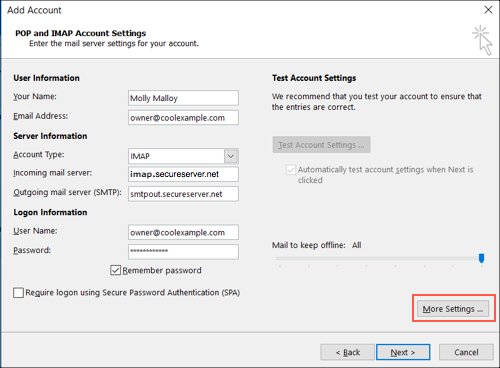
- On the Pop and IMAP Account Settings screen, confirm or update settings details:
Field What to enter... Password Professional Email address password Username Professional Email address Type Select IMAP Incoming server Enter imap.secureserver.net Outgoing server Enter smtpout.secureserver.net - Click More Settings.

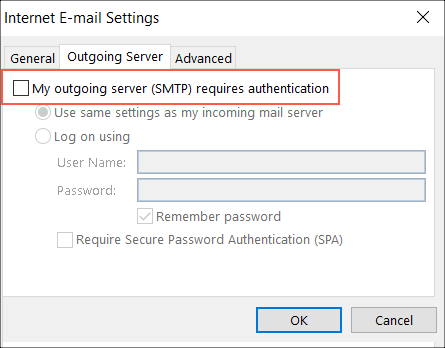
- Click Outgoing Server.
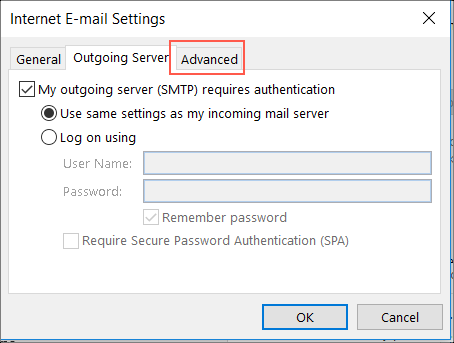
- Select My outgoing server (SMTP) requires authentication.

- Click Advanced.

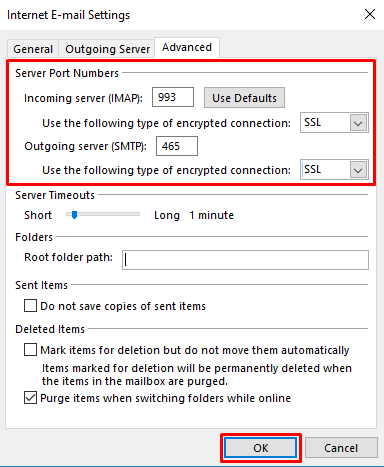
- Under Server Port Numbers enter the Incoming Server (IMAP) and Outgoing Server (SMTP) server settings:
Field What to enter... Encryption Type Incoming Server (IMAP) 993 SSL Outgoing Server (SMTP) 465, 587 SSL Internal Only Note: The following are the non-secure ports for Professional Email.Field What to enter... Encryption Type Incoming Server (IMAP) 143 None Outgoing Server (SMTP) 25 None - Click OK.

- Click Next to complete email set up. The next page should show green checkmarks as the configuration process completes.
- To see if your email is set up properly, send yourself a test email message from your webmail. When you receive it, reply from Outlook to test your outgoing server settings.
Note: If Outlook 2016 still cannot verify your account information, please contact customer support
Note: As a courtesy, we provide information about how to use certain third-party products, but we do not endorse or directly support third-party products and we are not responsible for the functions or reliability of such products. Third-party marks and logos are registered trademarks of their respective owners. All rights reserved.
