
Table of Contents
Updating SMTP and IMAP settings for email client
Updated Jul 4th, 2024 at 10:29 BST
Thunderbird#
Adding an account
Click to expand the Thunderbird configuration!
Open Thunderbird App and go to Cogwheel (left sidebar) then click on Account settings > Account Actions > Add mail account.
The domain does not have an SSL certificate > the server hostname will be used instead.
Example:
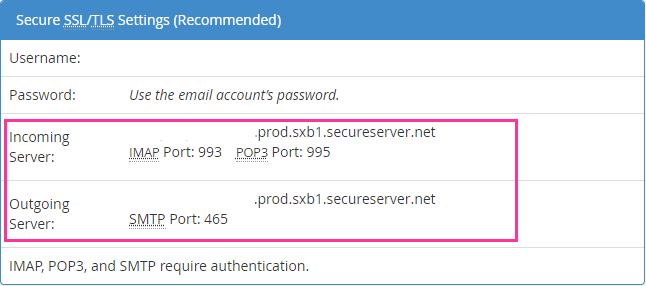
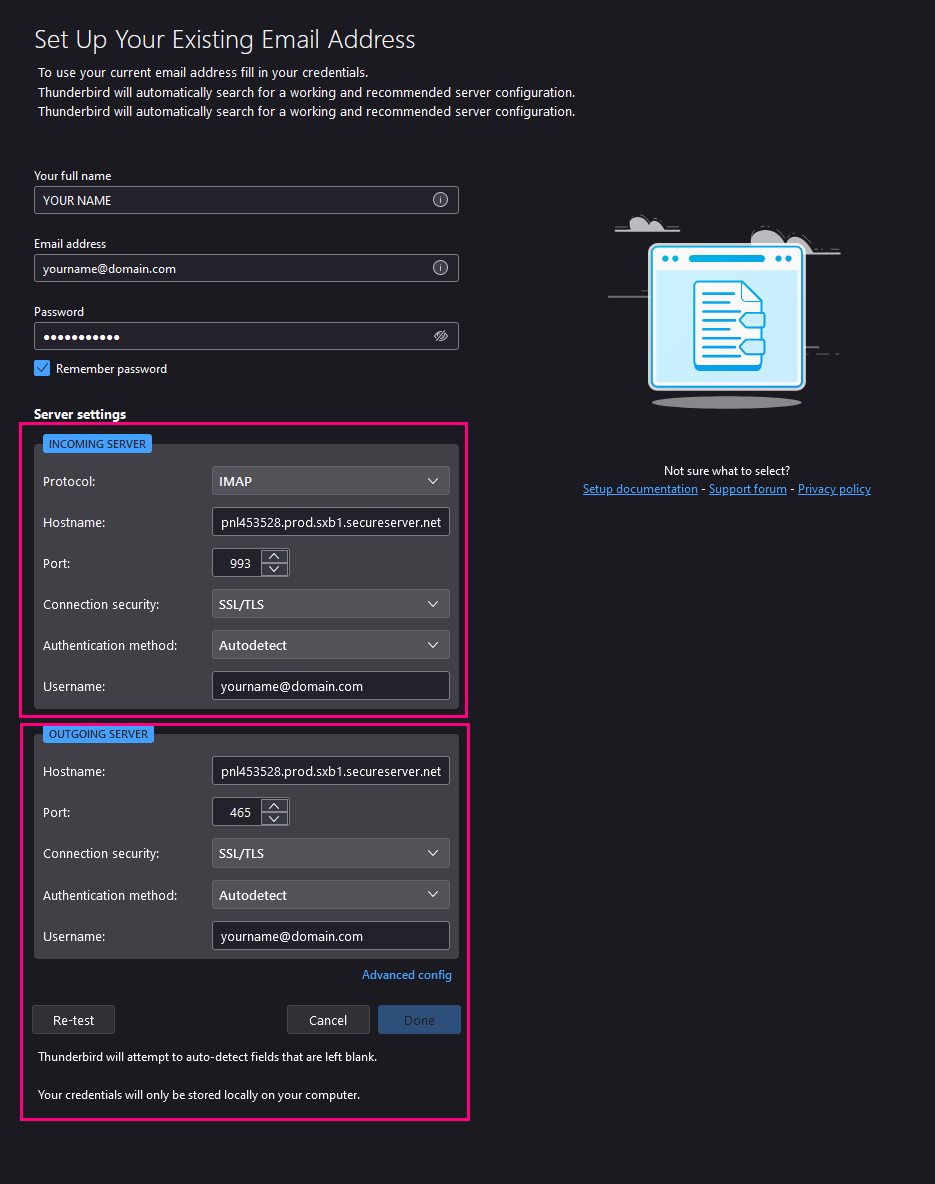
This is how it should look in Thunderbird:
When trying the auto-configuration without an SSL certificate, Thunderbird WILL NOT configure the IMAP/SMTP settings correctly, therefore they need to be added manually.
The domain has an SSL Certificate for WWW and NON-WWW or if using AutoSSL, it has an SSL for mail.domain.tld as well, then auto-configuration will work.
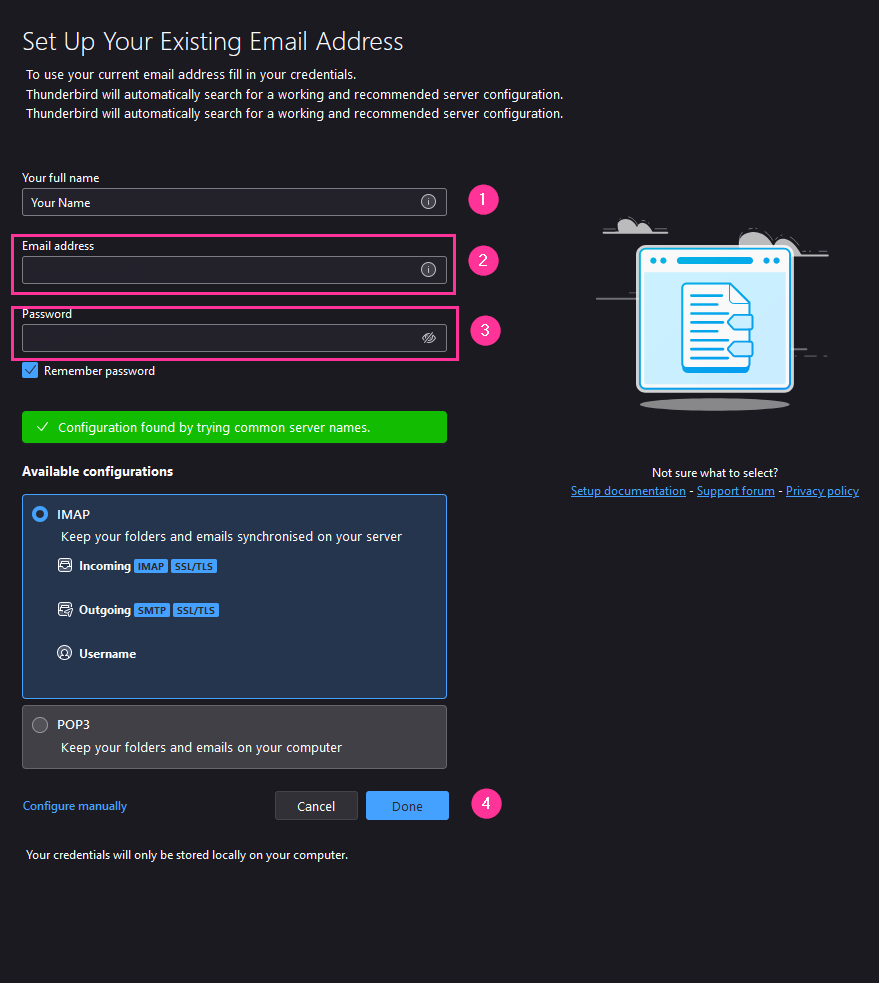
In some cases, you will see only the DOMAIN.TLD configured automatically.
Updating IMAP and SMTP servers
Click to expand the Thunderbird configuration!
Open Thunderbird App and go to Cogwheel (left sidebar) then click on Account settings.
Update IMAP server
Click the Server Settings under the email you want to configure and adjust the server name as necessary.

Update SMTP server
Click the email address in the left sidebar then click on Edit SMTP Server

Input the new details
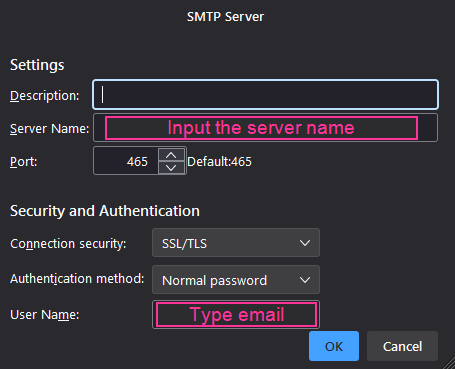
Our systems will use SSL/TLS and Normal Password for Authentication
Update the password
Click the COGWHEEL on the left then go to Privacy and Security and click on Saved Passwords
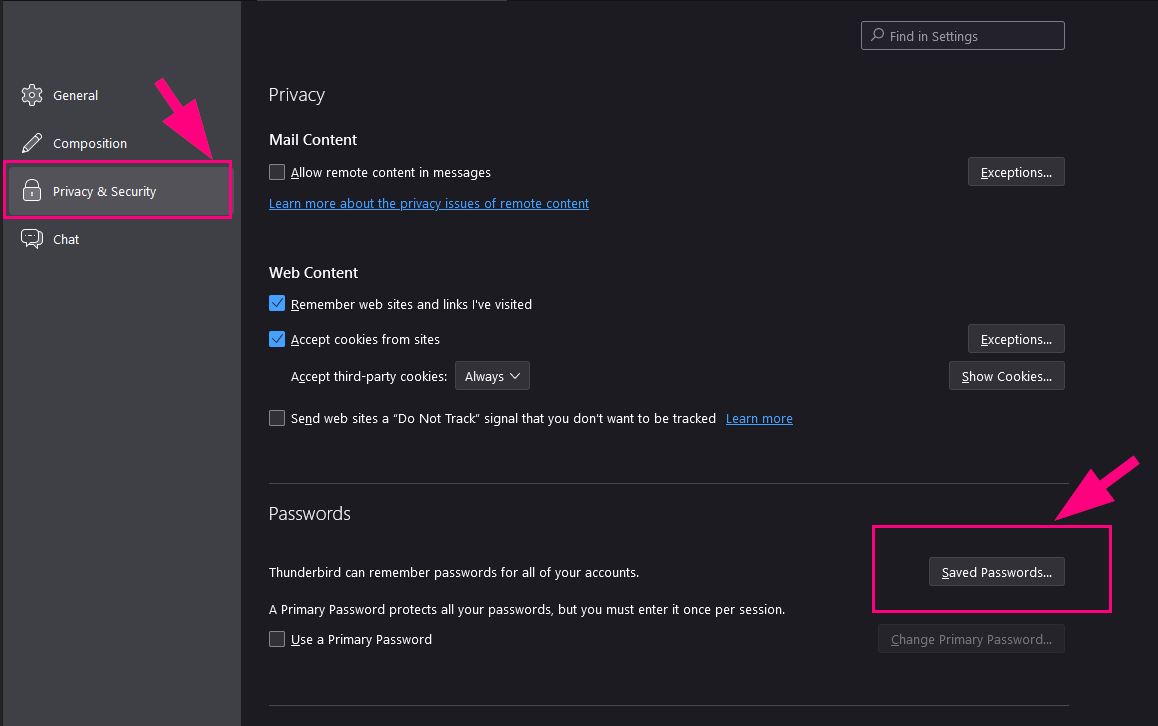
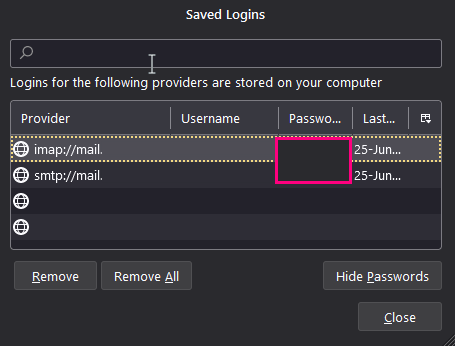
Click the button to SHOW PASSWORDS and locate IMAP and SMTP associated with that email address/username
Right click the field and select Edit Password
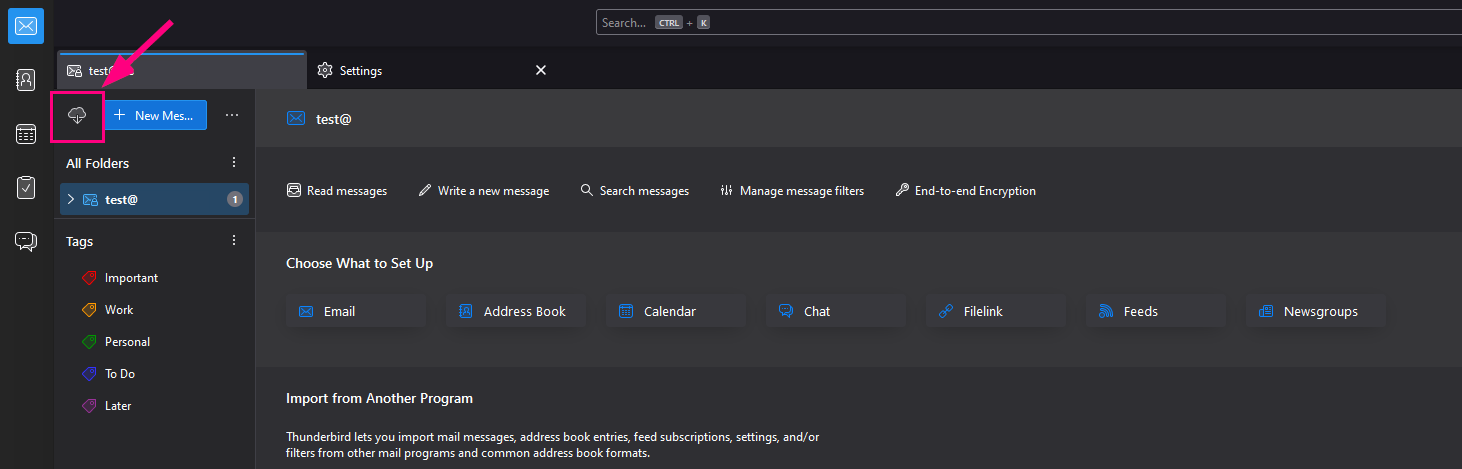
Go back to the email (where all the folders are) and click on the cloud with the arrow
Outlook#
Adding an account
Click to expand the Outlook configuration!
The domain does not have an SSL certificate > the server hostname will be used instead.
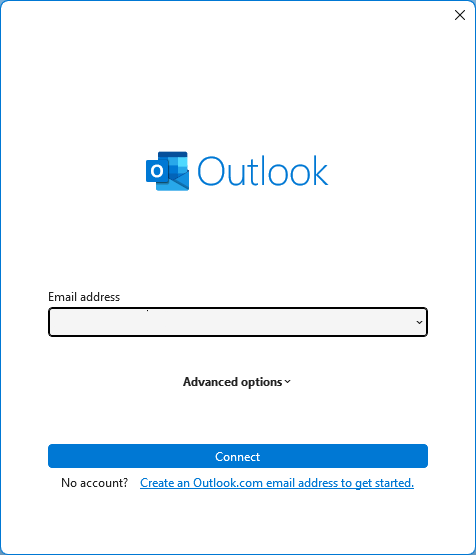
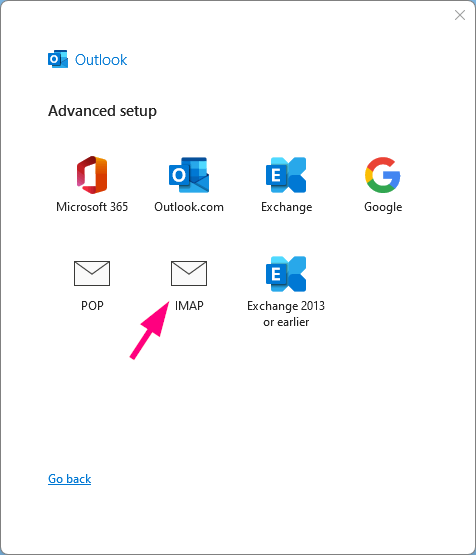
Open Outlook and type the email address
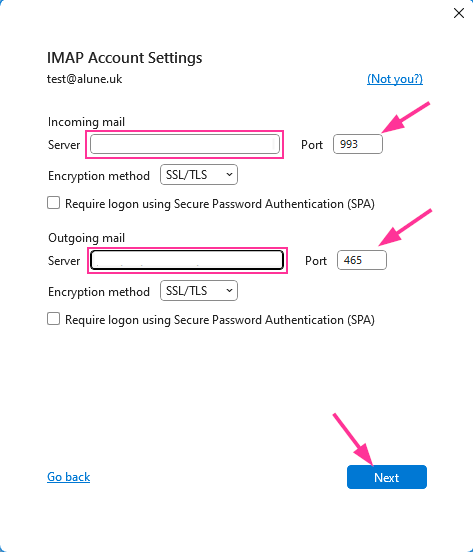
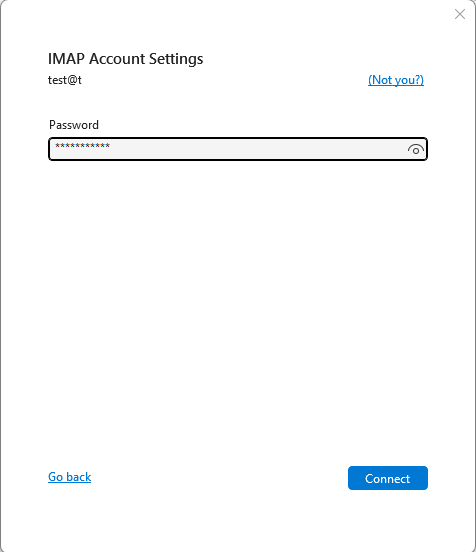
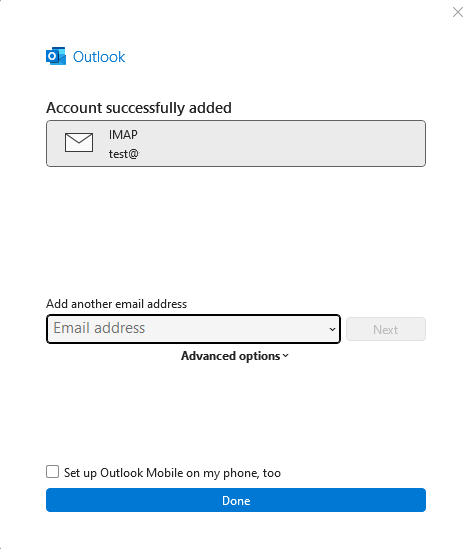
Choose IMAP then enter the details manually: server name, port and click on Next and input the Password and click
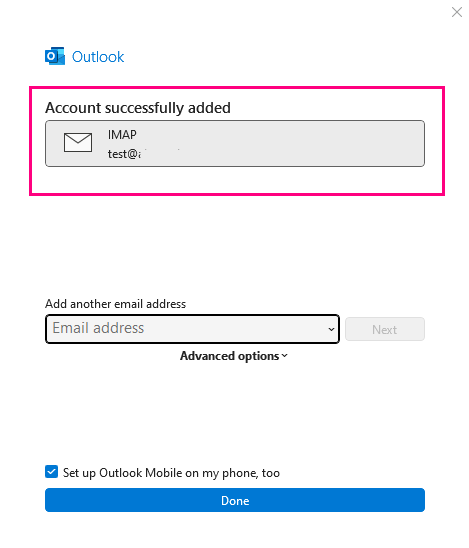
You will then get Account successfully added
The domain has an SSL Certificate for WWW and NON-WWW or if using AutoSSL, it has an SSL for mail.domain.tld as well, then auto-configuration will work.
Repeat the same steps and open Outlook then enter email and click Connect

Enter the password and click Connect
Account added successfully
Updating IMAP and SMTP servers
Click to expand the Outlook configuration!
Open Thunderbird App and go to Cogwheel (left sidebar) then click on Account settings.
Update IMAP and SMTP server
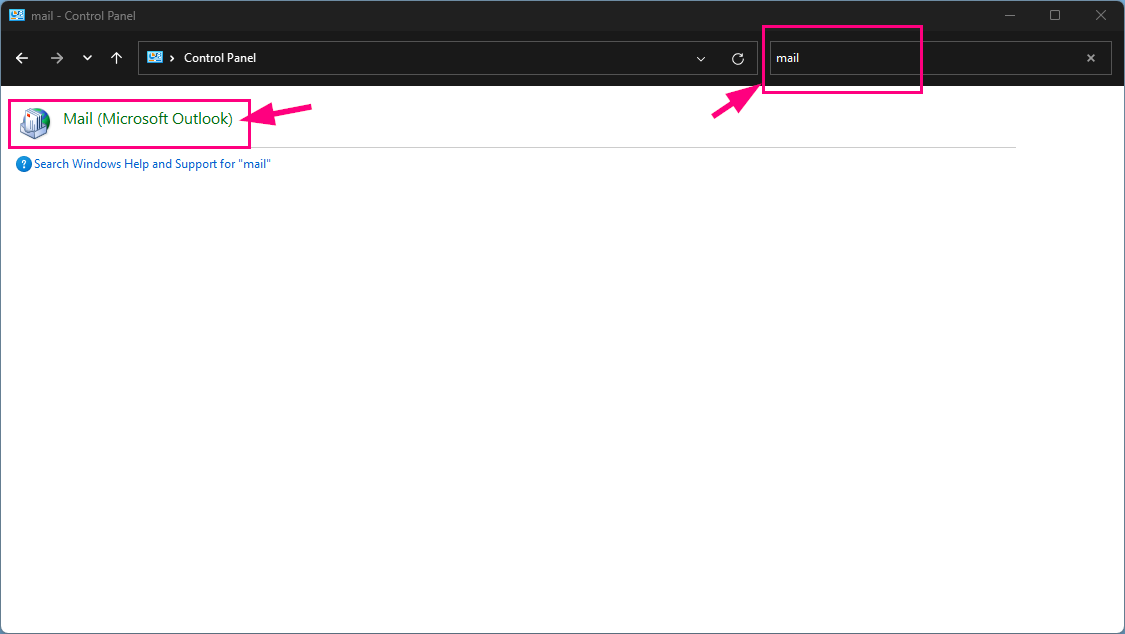
Go to Windows Control Panel and search for Mail then click on Mail (Microsoft Outlook)
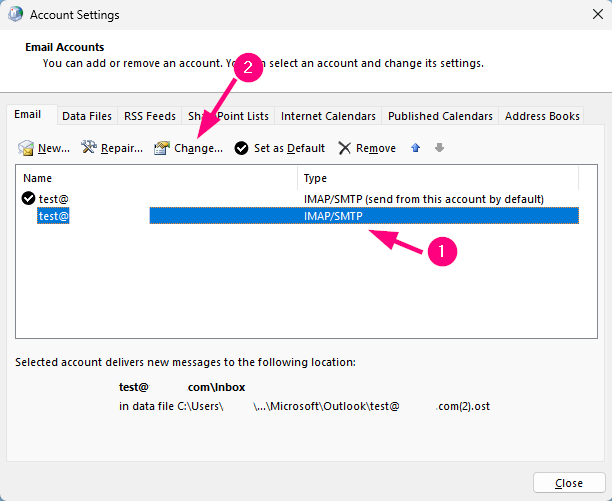
Click on Email accounts then select the email and click on Change
Adjust the details as necessary
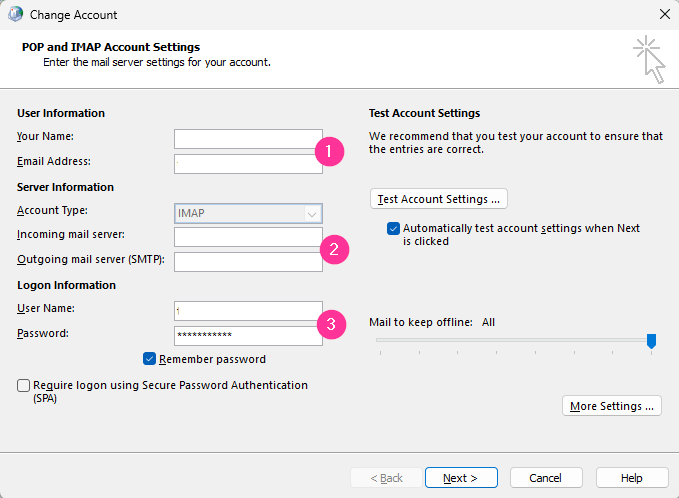
To adjust additional settings click on More Settings then:
- Outgoing server tab: Use the same settings as the incoming server (this usually stays the same, make sure the IMAP server is correct)
- Advanced tab: Make sure the ports are correct
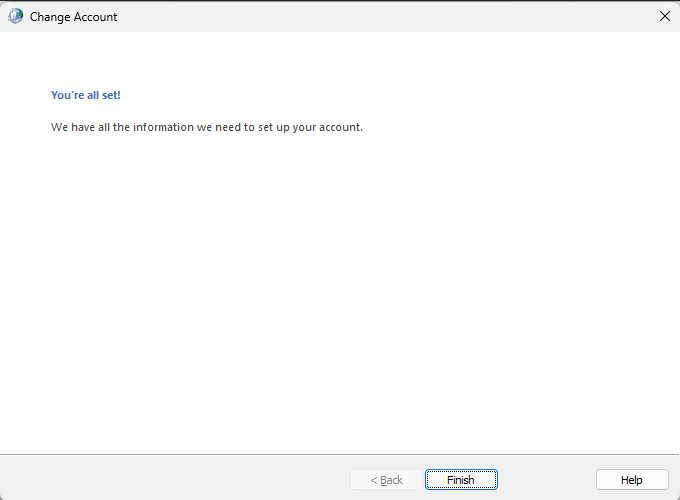
Test the settings using Test Account Settings or click Next
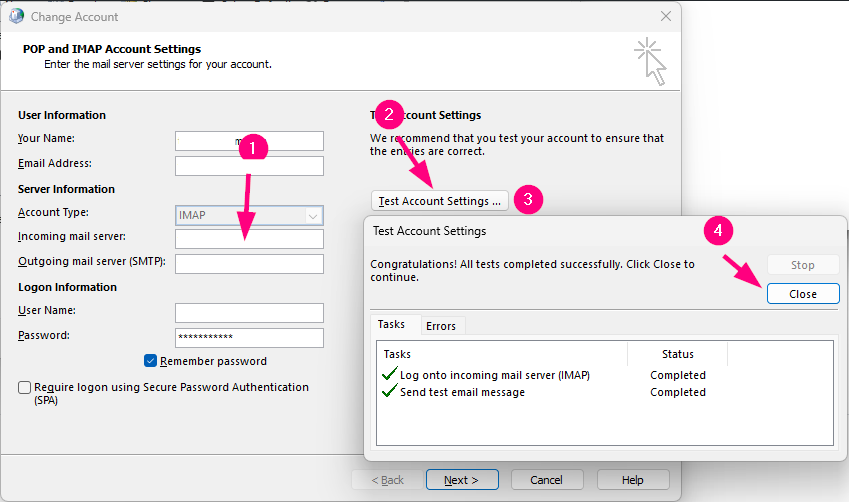
Congratulations, you did it!
iPhone Mail#
Adding an account
Click to expand iPhone Mail configuration!
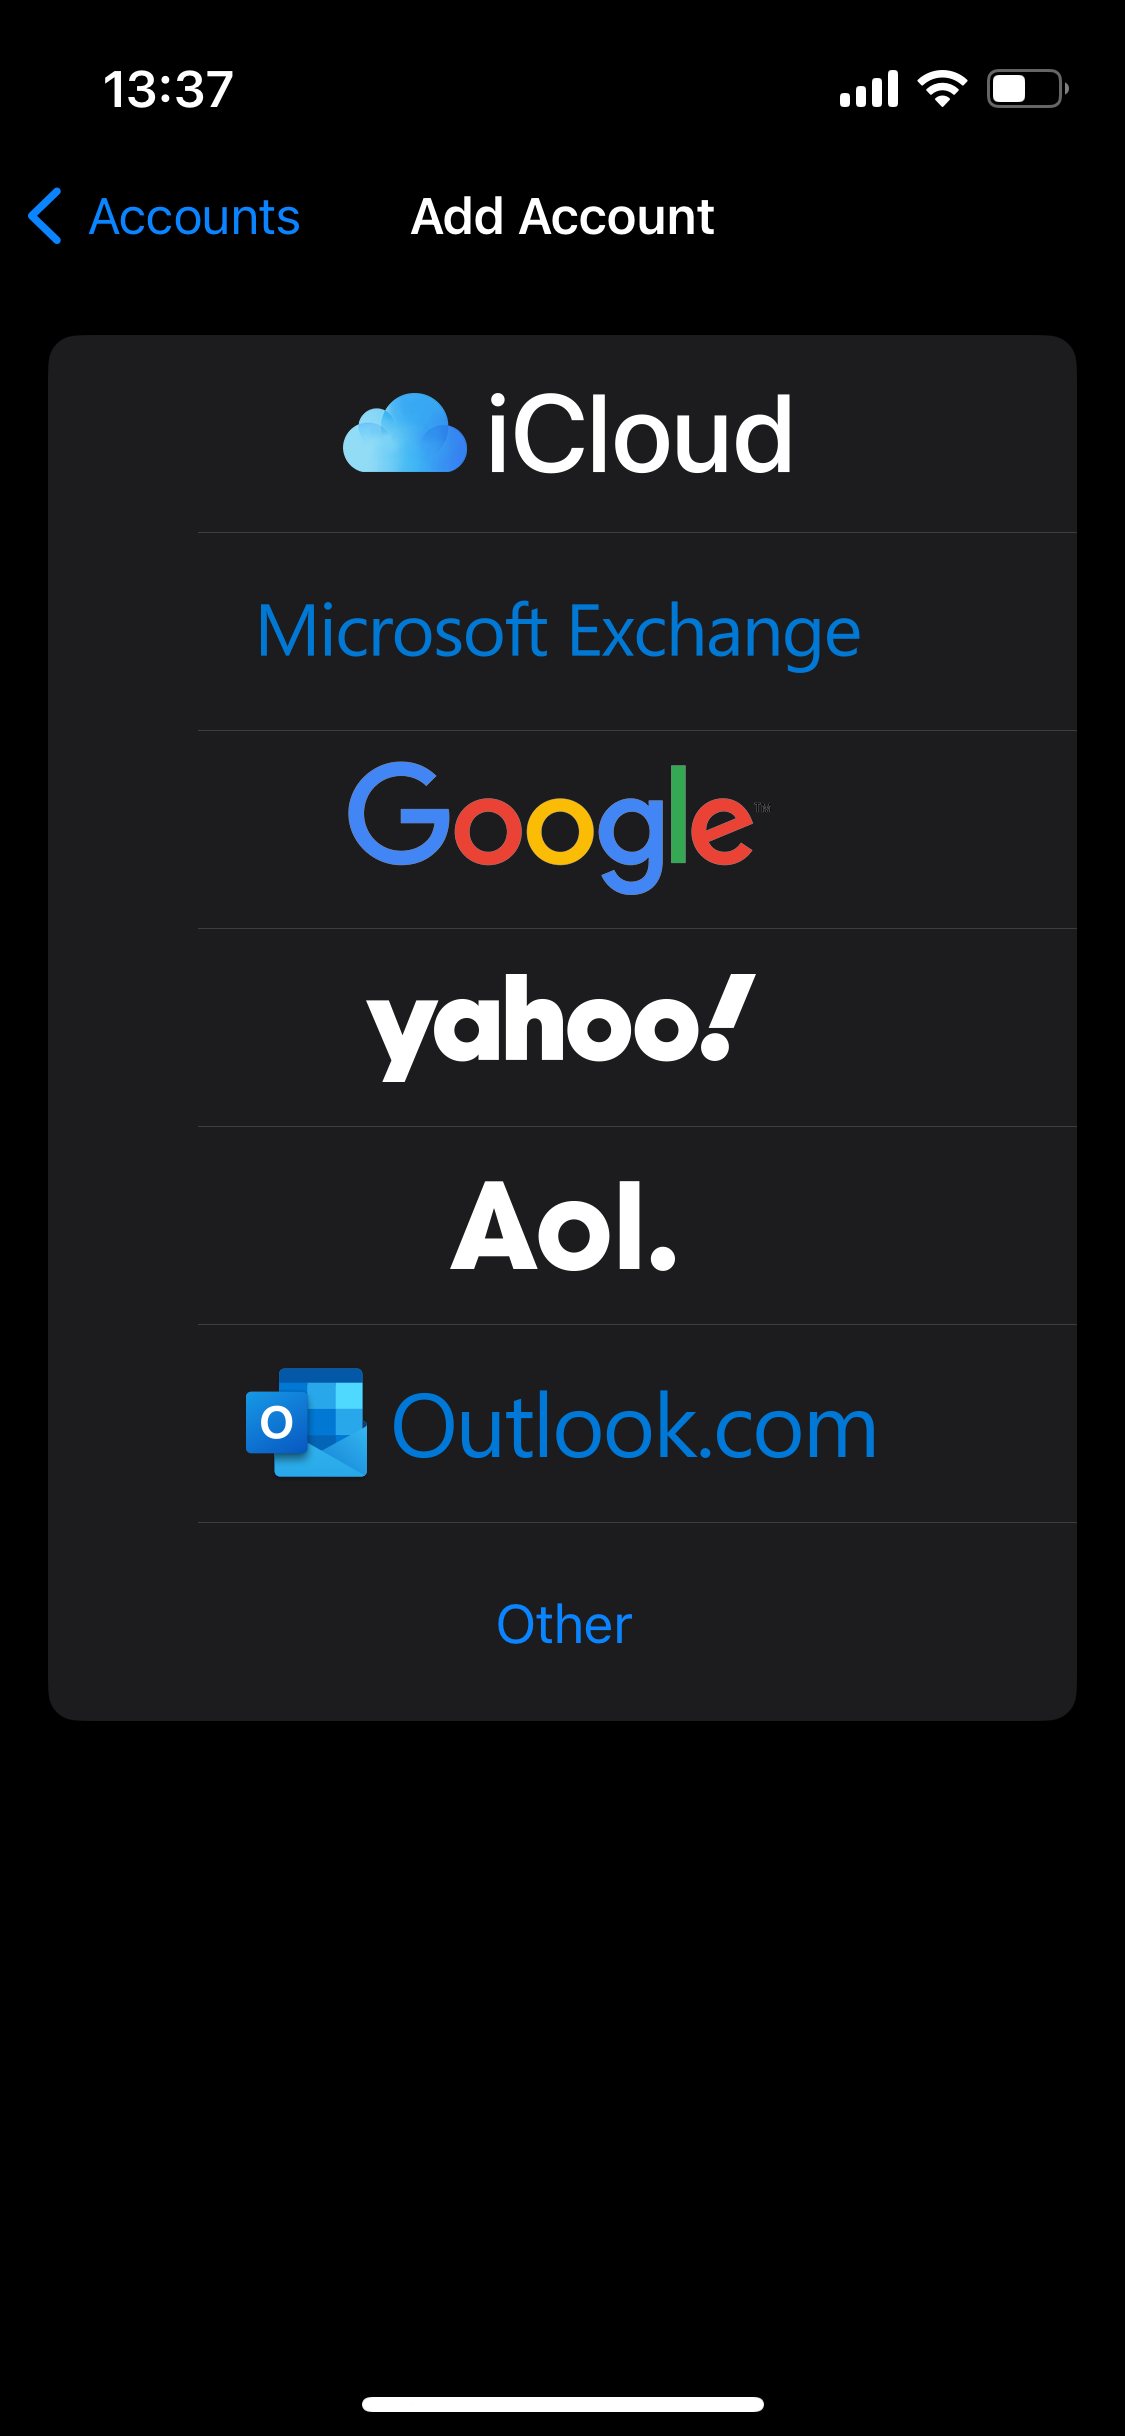
Go to Settings icon > (scroll down) > tap on Mail > Add account > Other and tap on Add Mail account

The domain does not have an SSL certificate > the server hostname will be used instead.
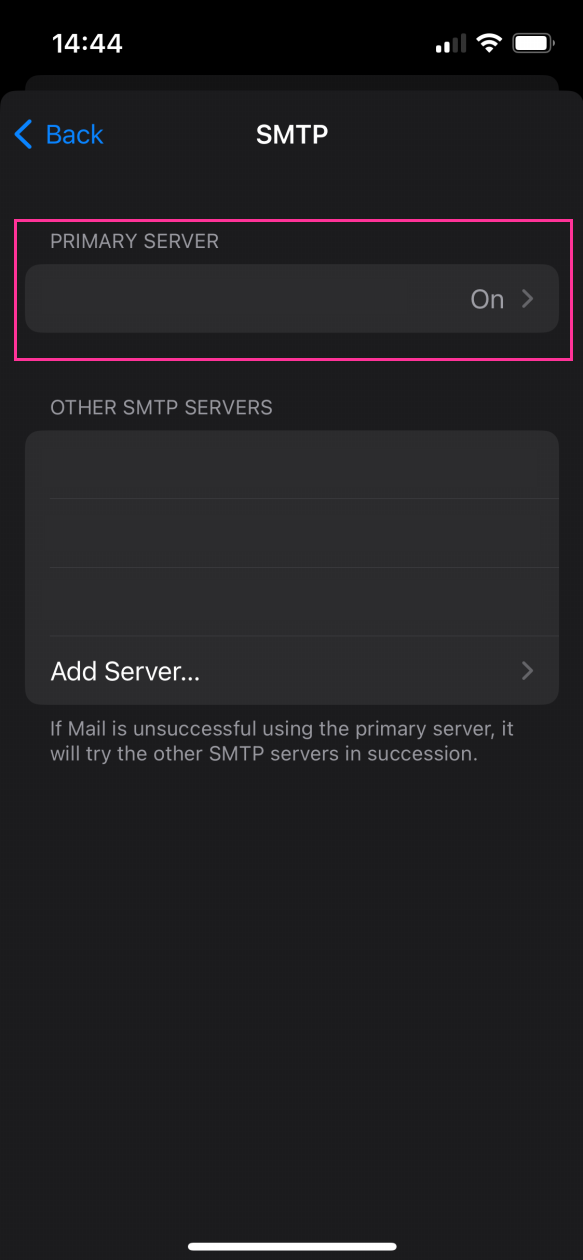
Note: If you get an error about SSL certificate, you can ignore it and continue with the configuration. Then you can go to Settings > Passwords and Accounts (Or Accounts)> tap on the email you want to configure > tap on the account under IMAP > tap on the SMTP server under Outgoing Mail Server > tap on server under Primary Server.
- Tap to enable the usage of SSL
- Change Server Port to 465 and click on Done.
The domain has an SSL Certificate for WWW and NON-WWW or if using AutoSSL, it has an SSL for mail.domain.tld as well, then auto-configuration will work.
- Go to Settings icon > (scroll down) > tap on Mail > Add account > Other and tap on Add Mail account
Input the following details:
- Your name
- Your email address
- Your password
- Description
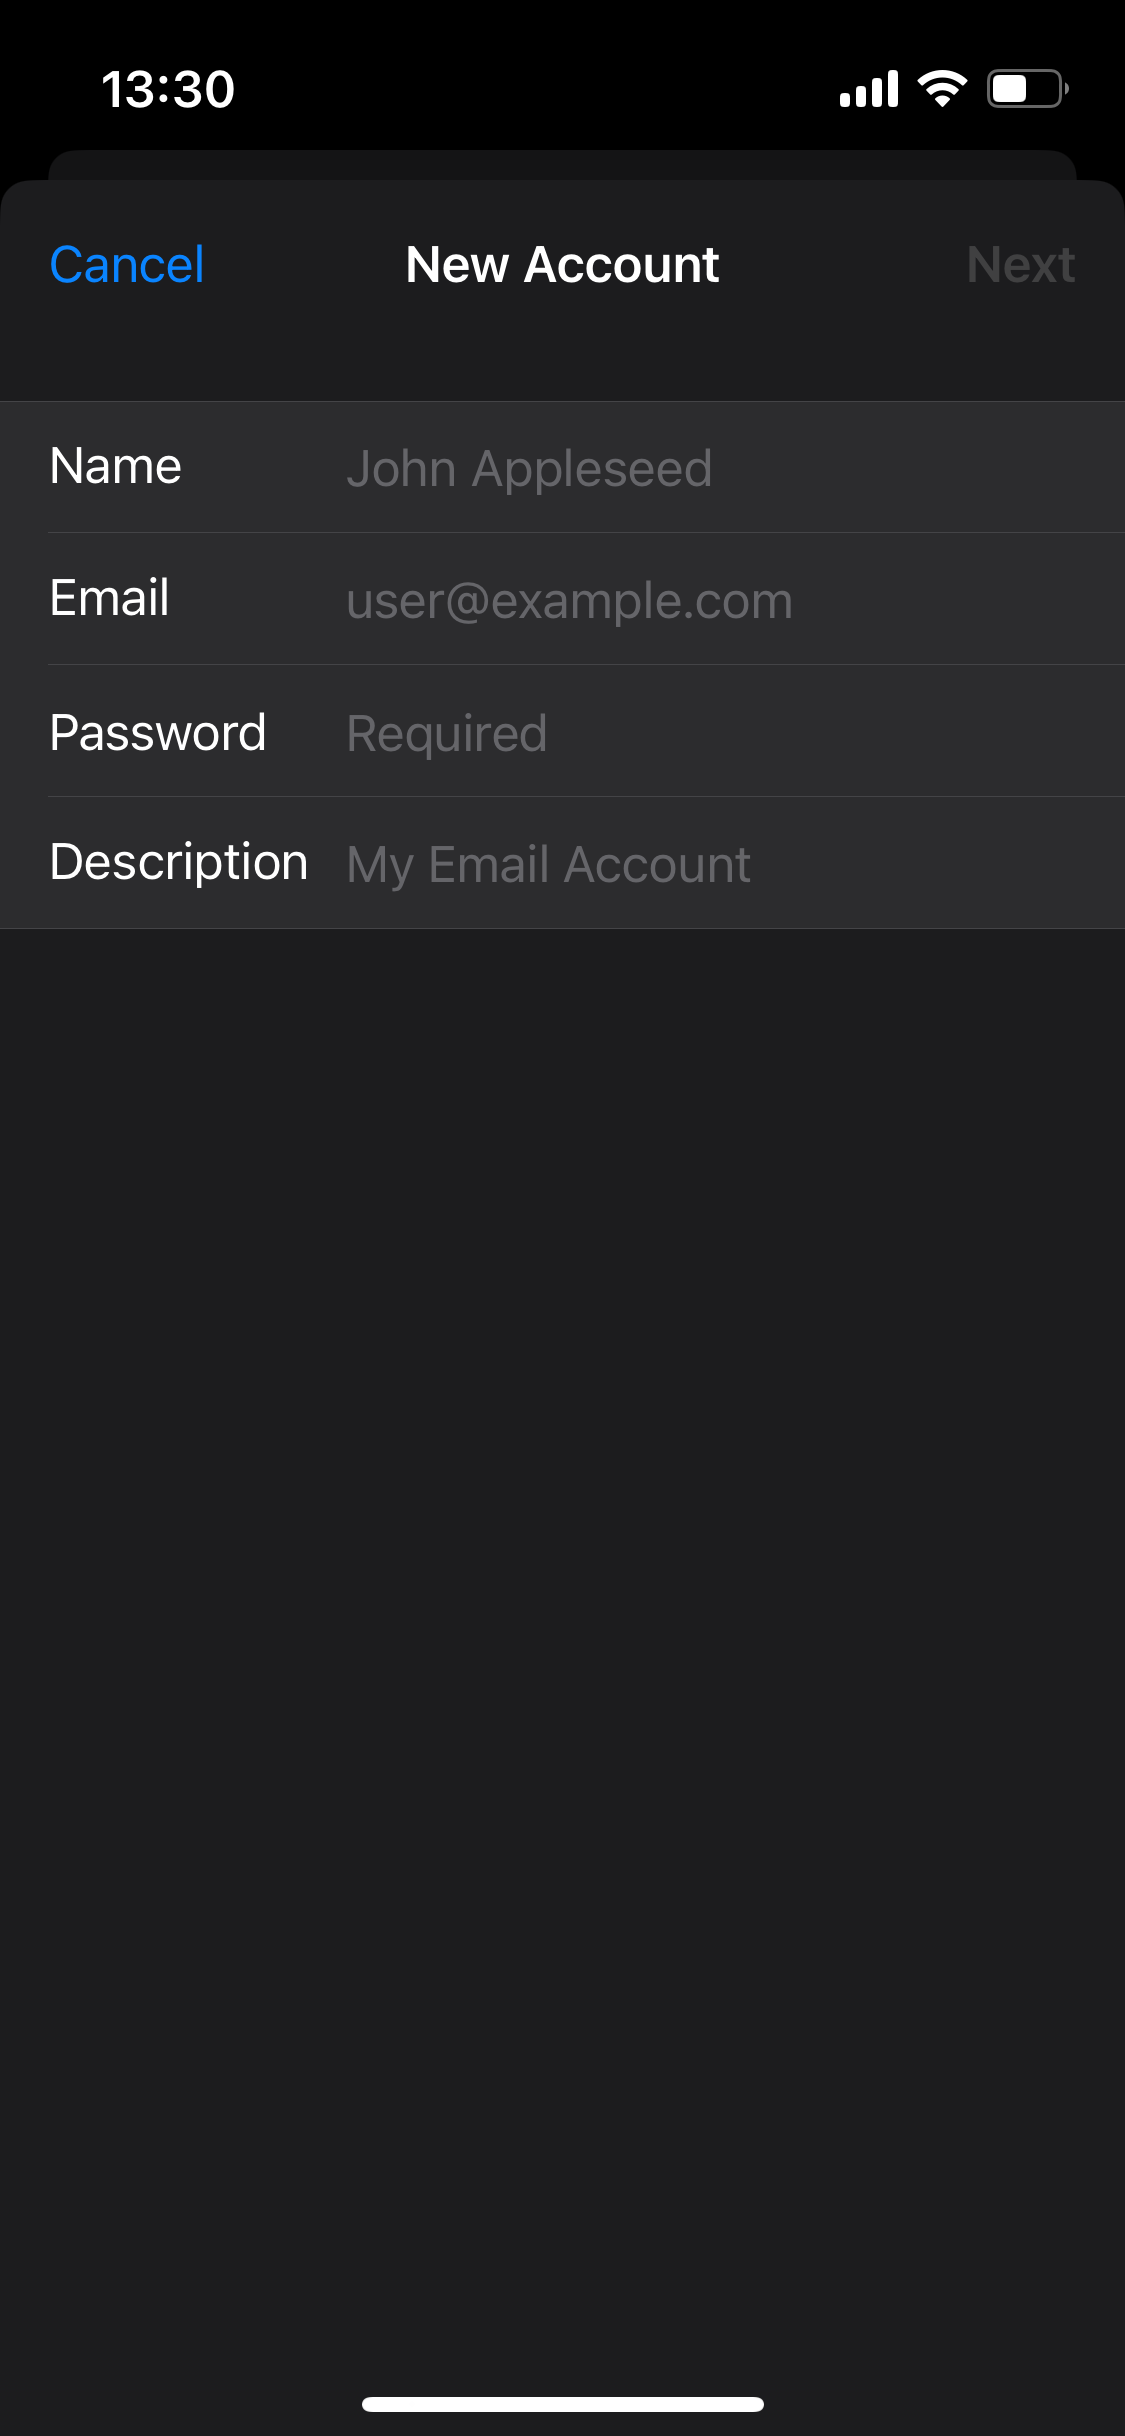
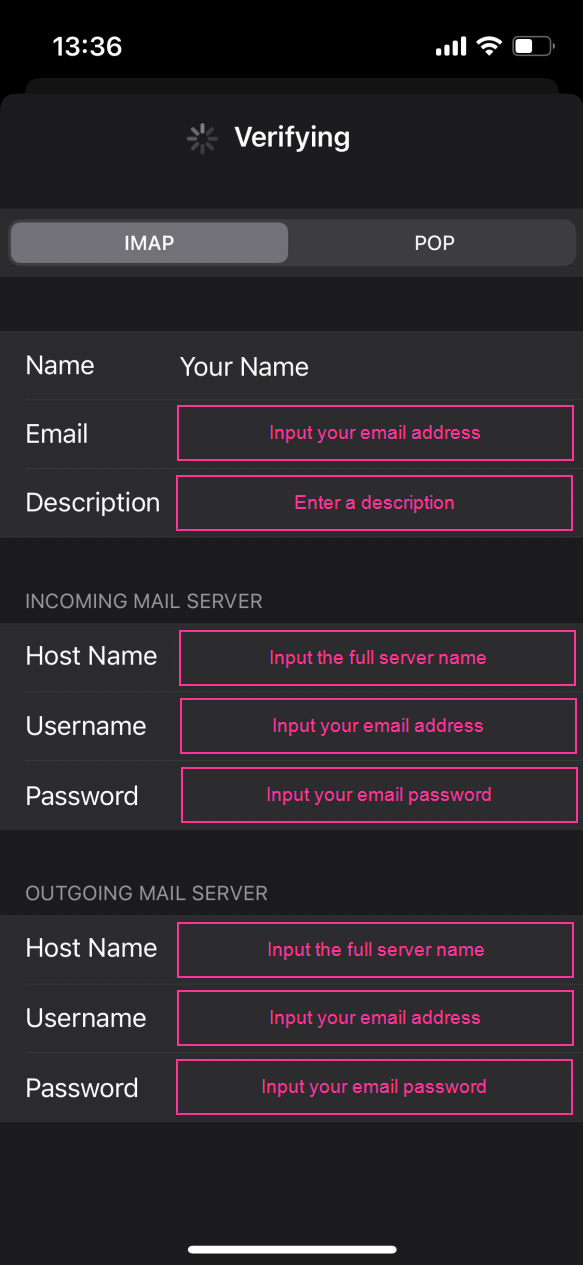
On the next screen fill the following details:
- Name
- Your email address
- Description
For the Incoming and Outgoing use the same details:
Note: We recommend using IMAP instead of POP as it’s more reliable.
- Hostname: Your domain name
- Username: Your email address
- Password: Your email password

Upon successful completion you will be presented with:
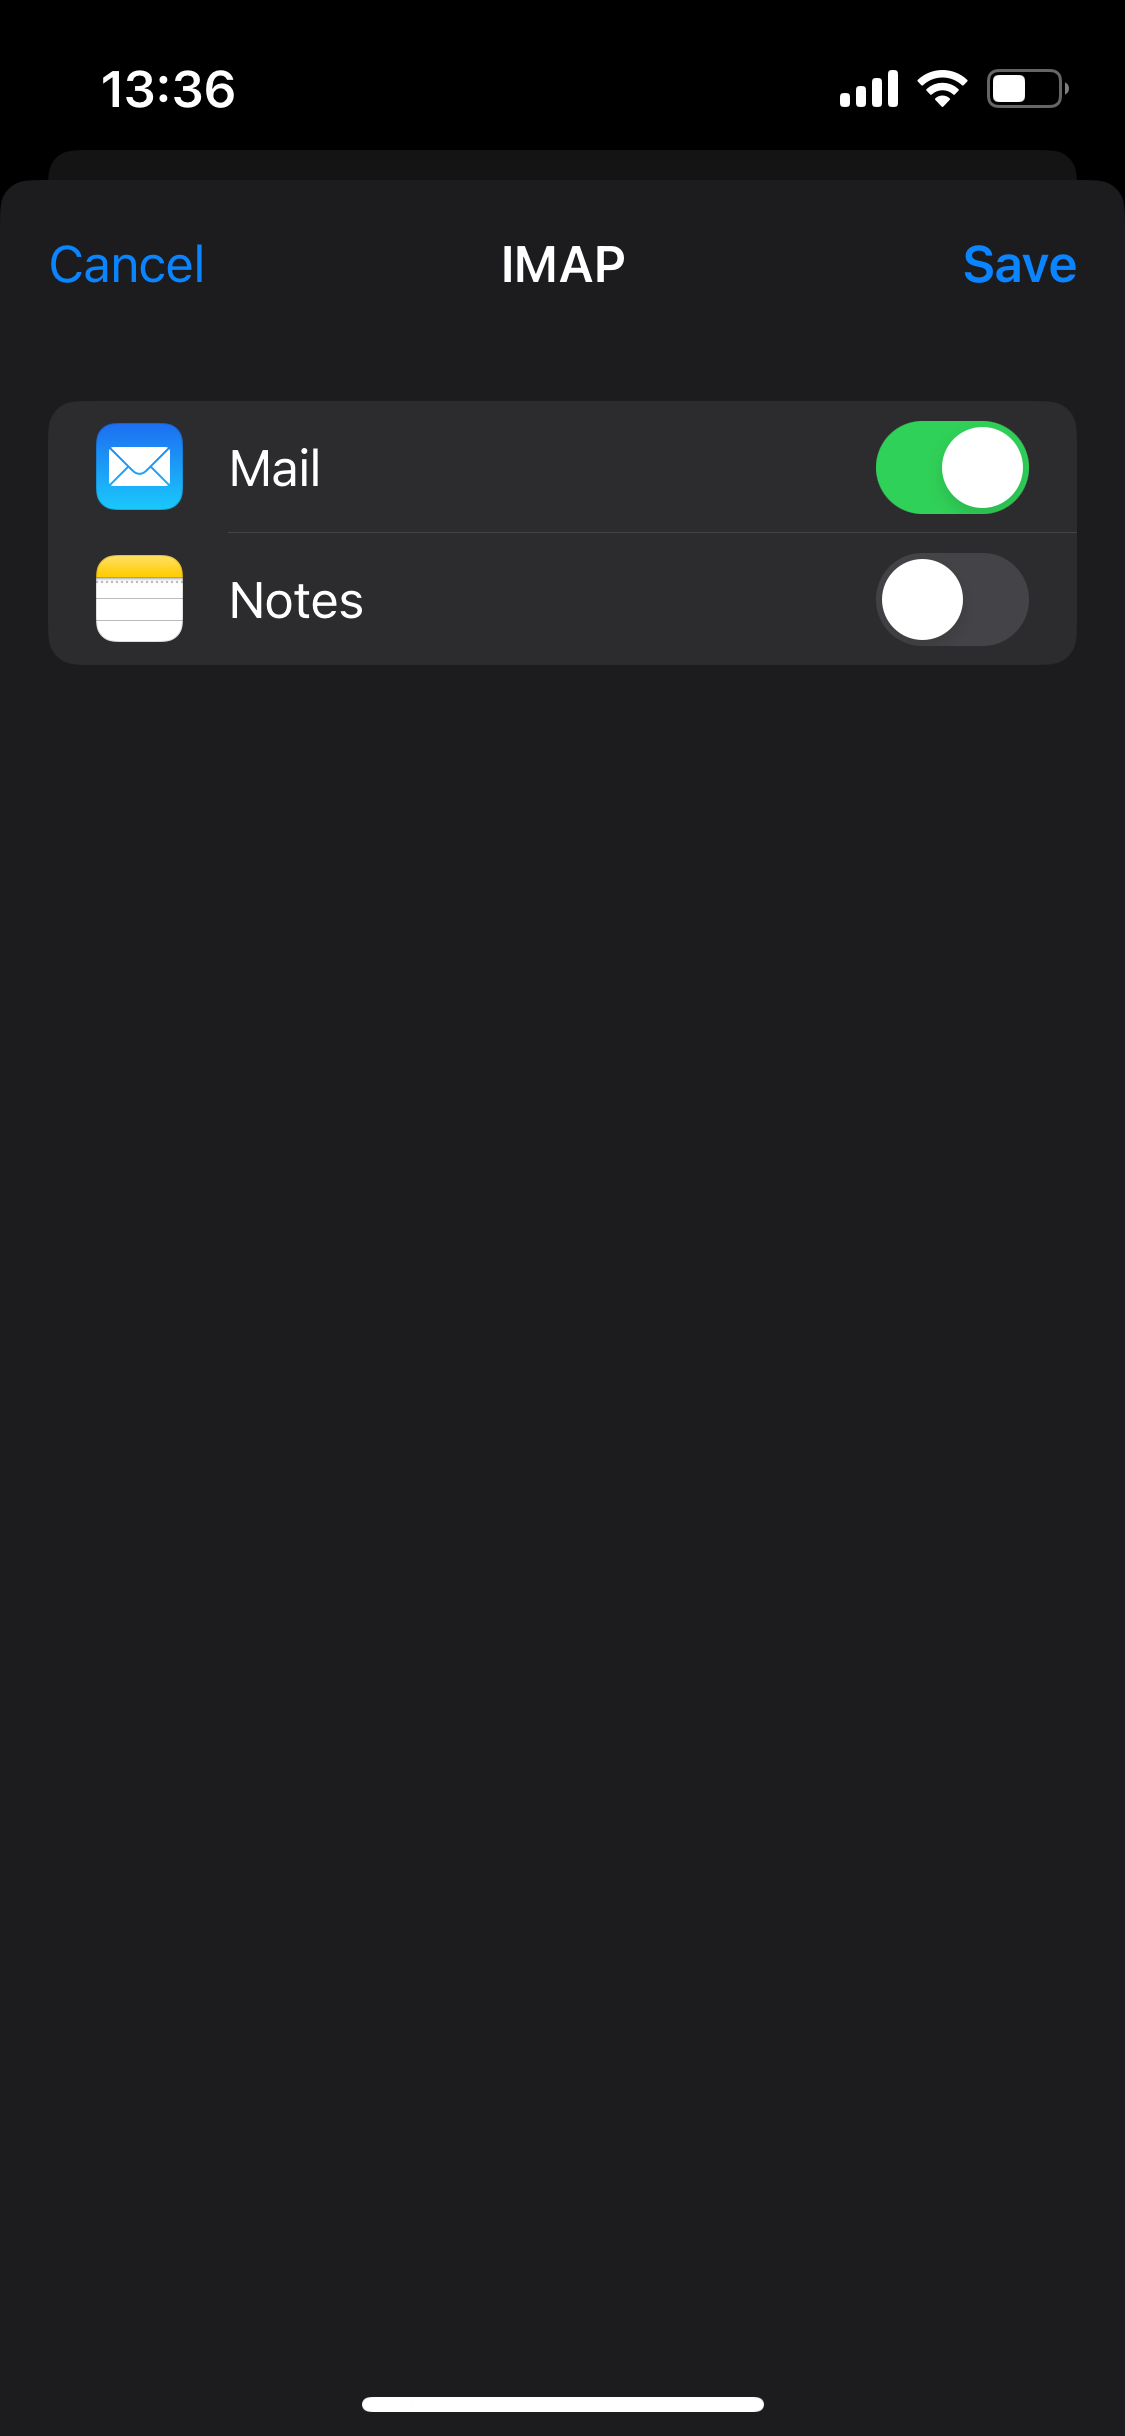
Tap on save and the email is added!
Updating IMAP and SMTP servers
Click to expand iPhone Mail configuration!
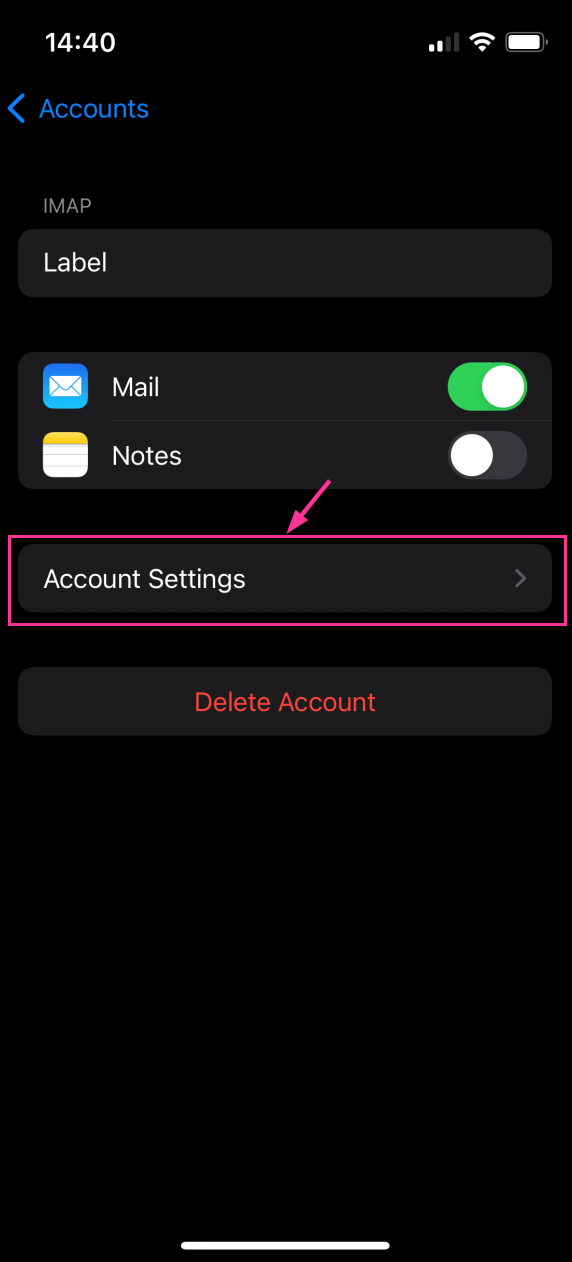
To update the SMTP and IMAP settings go to Settings > Passwords & Accounts (or Accounts) and tap on the email address then tap on Account Settings
Update IMAP settings
Tap on the email account and then under INCOMING MAIL SERVER enter the following details:
- Host name: Enter the hostname specified in cPanel Admin > Email Accounts > Connection Details next the email you want to configure.
- Username: Enter your email address
- Password: Enter your email address password
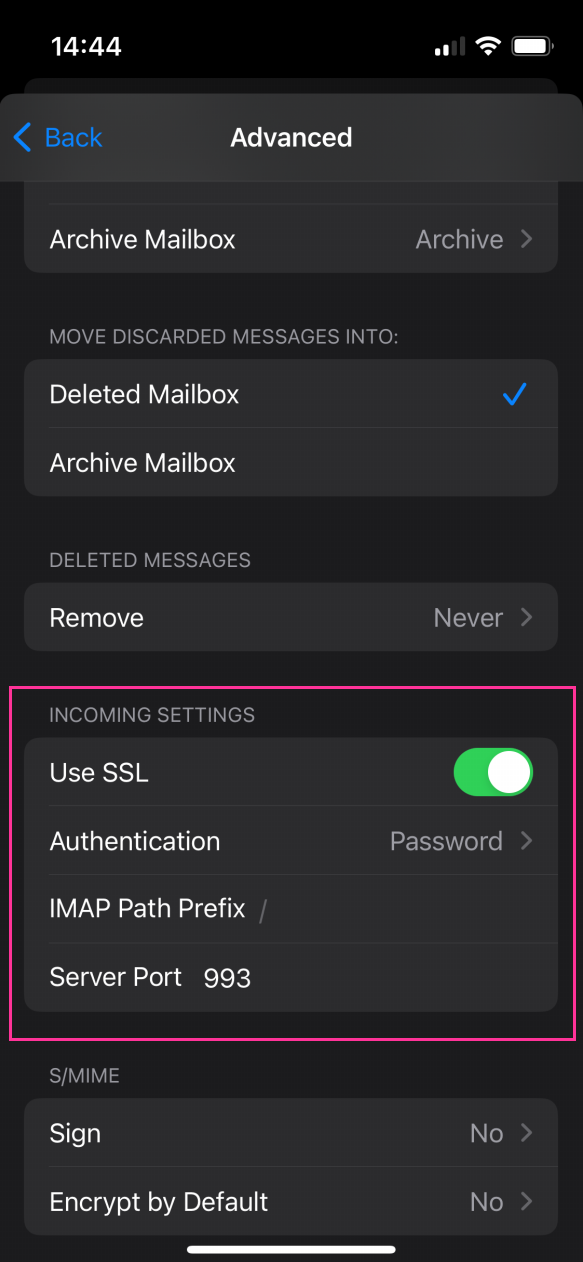
Note: To change the IMAP port on the same screen tap on Advanced then scroll down and adjust the Incoming Settings, but this time the Server Port would be 993.
Update SMTP settings
On the same page with IMAP settings, tap on SMTP account under OUTGOING EMAIL SERVER then tap on the server under PRIMARY SERVER and enter the following details:
- Host name: Enter the hostname specified in cPanel Admin > Email Accounts > Connection Details next the email you want to configure.
- Username: Enter your email address
- Password: Enter your email address password
- Use SSL: Toggle it
- Authentication: Normal
- Server Port: 465
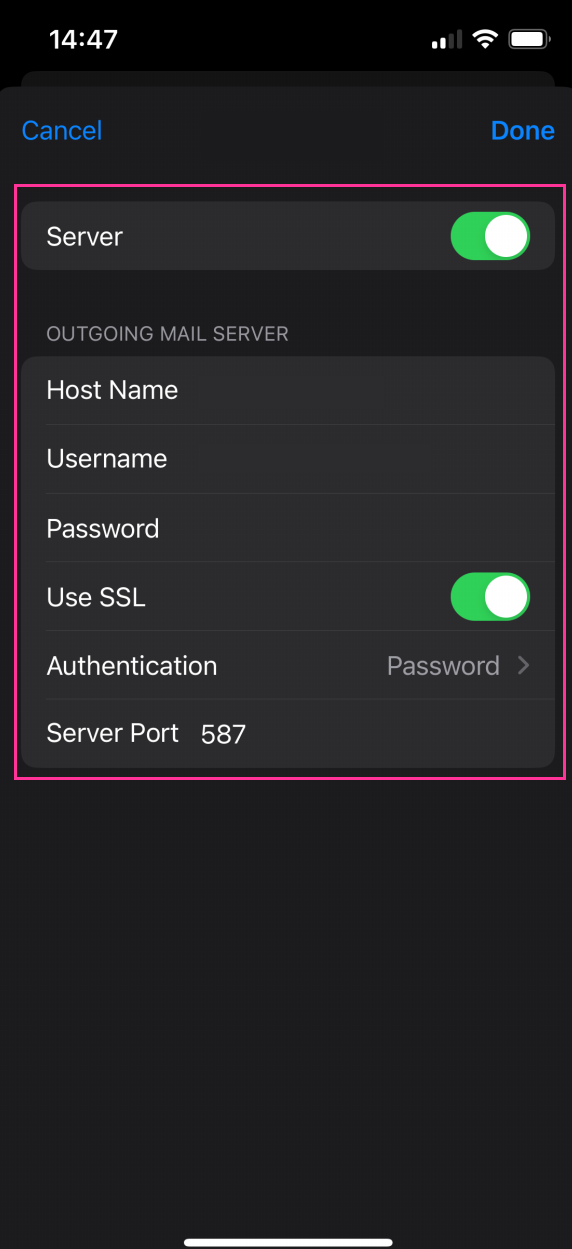
Once finished, tap on Done and email will begin working and getting the data.
Apple Mail#
Adding an account
Click to expand Apple Mail configuration!
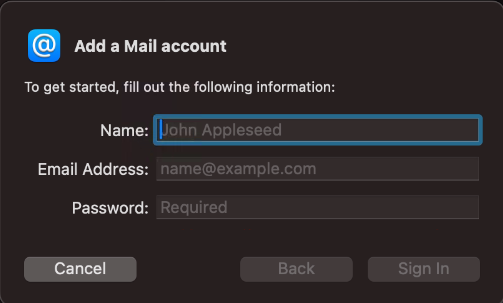
To add an account to Apple Mail open Mail then go to Mail > Add Account, select Other Mail Account and click Continue.
Input your name, email address and password then click Sign In

The domain does not have an SSL certificate > the server hostname will be used instead.
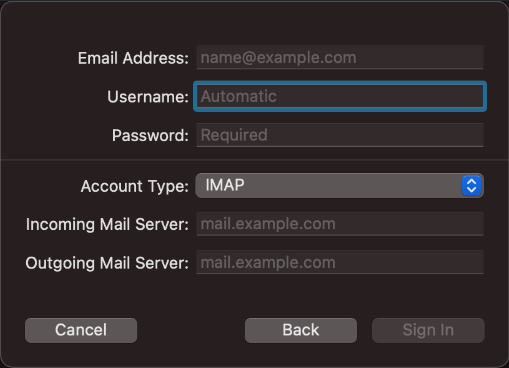
In the next screen fill the following:
- Email address: Your email address
- Username: Your email address
- Password: Your email address password
Connection details
- Account type: IMAP
- Incoming Mail Server: Enter the hostname specified in cPanel Admin > Email Accounts > Connection Details next the email you want to configure.
- Outgoing Mail Server: Enter the hostname specified in cPanel Admin > Email Accounts > Connection Details next the email you want to configure.
Once the servers have been configured, you will see the following screen:

Click Done to finish adding the email.
The domain has an SSL Certificate for WWW and NON-WWW.
To add an account to Apple Mail open Mail then go to Mail > Add Account, select Other Mail Account and click Continue.
Input your name, email address and password then click Sign In
In the next screen fill the following:
- Email address: Your email address
- Username: Your email address
- Password: Your email address password
Connection details
- Account type: IMAP
- Incoming Mail Server: Input your domain name associated with the email address you want to configure
- Outgoing Mail Server: Input your domain name associated with the email address you want to configure
Once the servers have been configured, you will see the following screen:
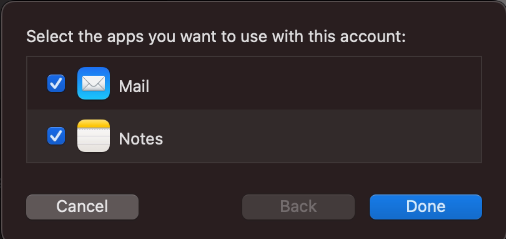
Click Done to finish adding the email.
Updating IMAP and SMTP servers
Click to expand Apple Mail configuration!
To update the SMTP and IMAP settings please open the Mail application then go to Mail (finder bar) > Settings
Click on account on the left and then click on Server Settings tab.
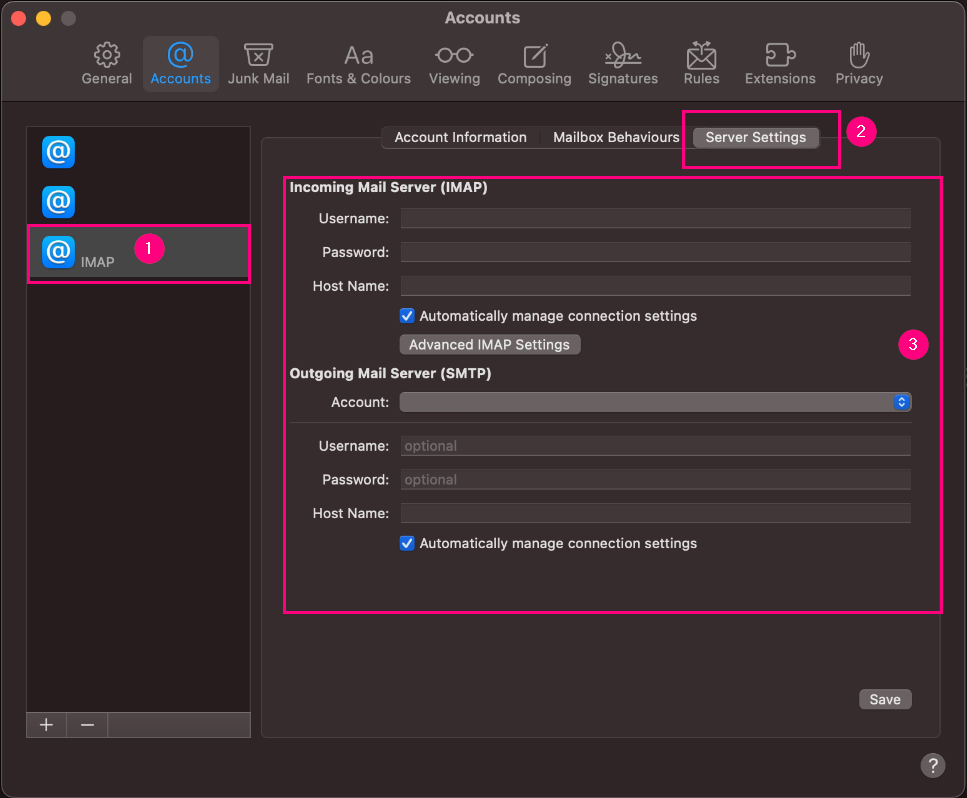
To manually Specify ports, uncheck the Automatically manage connection settings then enter desired ports:
- Secure IMAP Connection port: 993
- Secure SMTP Connection port: 465
Note: To use these ports, make sure to check the “Use TLS/SSL” options for both IMAP and SMTP
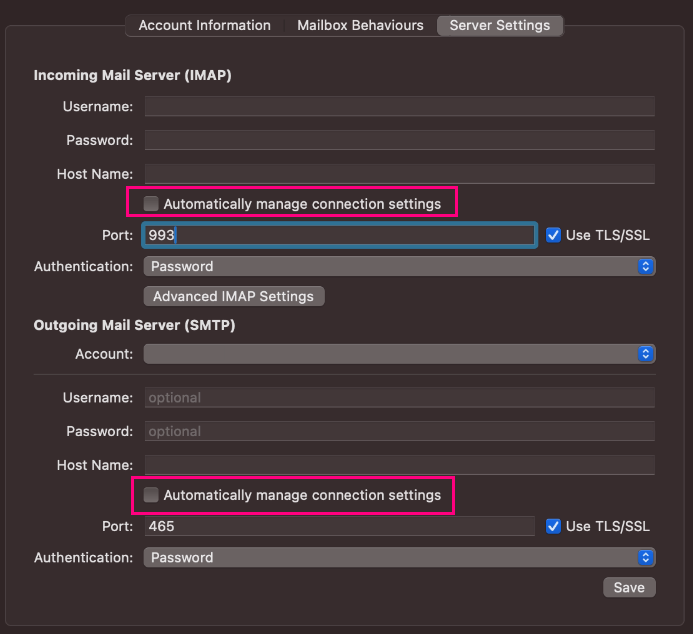
Click Save and the email is now configured with correct settings.