
Table of Contents
How to update the Incoming/Outgoing settings for your email account in Apple Mail
Updated Dec 8th, 2021 at 10:27 GMT
This article explains how to adjust mail settings for an email address you have already configured.
- Big Sur, Mojave, and Catalina
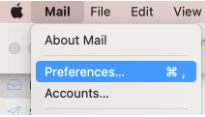
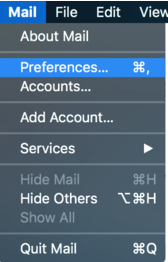
- In the top menu bar click Mail
- Select the Preferences option.
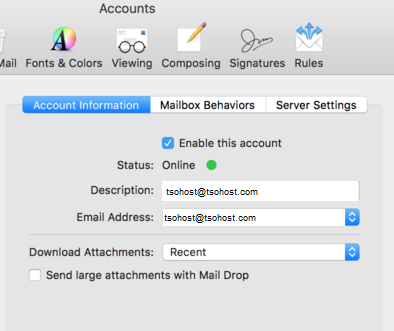
- Click the @ Accounts option in the top bar.
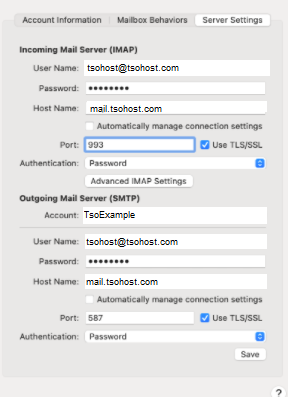
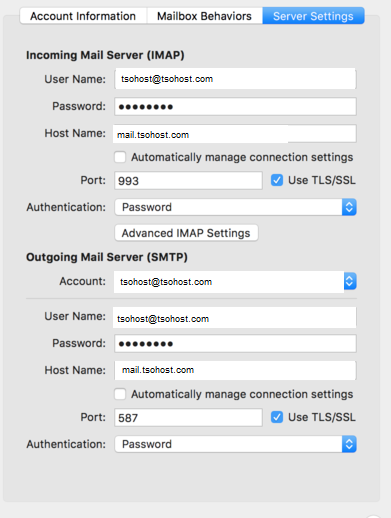
- Click the Server Settings tab.
- Edit the Incoming/Outgoing Host Name fields to match your mail server
- To edit the Incoming/Outgoing ports, UN-check Automatically manage connection settings. The Port field and Use TLS/SSL checkbox then appear.
- When finished, click the Save button
- Sierra and High Sierra
- Open the Apple Mail application by clicking Mail in the top menu bar.
- Select the Preferences option.
- Click the @ Accounts option in the top bar.
- Click the Server Settings tab.
- Edit the Incoming/Outgoing Host Name fields to match your mail server
- To edit the Incoming/Outgoing ports, UN-check Automatically manage connection settings. The Port field and Use TLS/SSL checkbox then appear.
- El Capitan
- Open the Apple Mail application by clicking Mail in the top menu bar.
- Select the Preferences option.
- Here you can edit the incoming server name. View the Email Server name table to ensure you're using the correct server name.
- To edit the port number, click the @ Accounts option in the top bar.
- Click the Advanced tab in the upper right.
- Edit the incoming Port number and enable/disable SSL by selecting/deselecting the Use SSL box, as needed.


If you are facing any difficulties with changing the server settings, please try to remove the account and to re-add it with the new settings.
IMPORTANT! - We recommend removing and re-adding the account, only if you are using an IMAP protocol.